This kit was the second kit I decided to build. I wanted to do what I considered a ‘real’ model build — good paint job, getting rid of the seams and weathering so actually ended up buying two of the things in case I really screwed something up.
Initially, I spent a fair amount of time dry-fitting the upper and lower pieces together. I’d read that they weren’t molded to fit together very well, and that was correct. It took quite a bit of fitting and filing to get it to seat correctly. Other pieces weren’t as bad, but may parts still required a bit of filing and sanding. Dry fitting is essential.
So this was going to be A Real Model. Meaning I was going to spend some effort making the paint job somewhat “realistic”. I’d realized when building the Flying Sub that the days of spending five bucks on a Testors paint set and a brush were gone. Sure, you could still do that, but the paint wasn’t all that good and besides, I wanted to use acrylics.
I wanted the panel lines on the model to pop so I did some research and bought some micro pens. I’d already practiced some of the basics on some miniatures that came with the paint kit I bought. Basics like washes and weathering. I figured that I could paint the shell with primer, then paint it with the base color, then do a wash with black. I’d even gotten an air brush to do the large areas know that I’m incapable of painting large areas of plastic (or anything else) without leaving brush strokes.
So I did just that. The primer went on with no problem and even the base coat looked good. I’d decided against going with the colors recommended in the instructions because I didn’t think I could pull off making the blue look right. Grey it was.
Finished it up, let it dry then figured I’d do a black wash over it to fill in the panel lines.
DISASTER!
It looked like utter and complete crap.
After the paint had somewhat dried, and I knew it was going to look like crap I thought, what the heck? Let’s see if I can remove it before I go back and have to repaint the thing. I wet a paper towel and started to scrub and WALAH! It worked! Not only did the black paint come off, but it left the skin looking sort of like how I wanted it to look:
 This was the tail section, and it seemed to look pretty good. The panel lines, however, were too faint until I went over them with the .03 micron ink pen that I’d bought just in case. Here is what the top shell looked like after doing the black wash, then wiping it off:

One of the things I really didn’t want to overdo was the weathering (although in the end, I’m not sure how successful I was). And, in fact, there are ALWAYS comments from people about the fact that you don’t need to weather a frakkin’ space craft! My response is, and was, that these fighters operate in space and in atmo, so it’s perfectly acceptable.
And since I was experimenting with various techniques, I decided to add one more. Rust:
 This was actually kinda fun. I went and bought some rust effect paint from Citadel and tried it out. I though it came out pretty good.
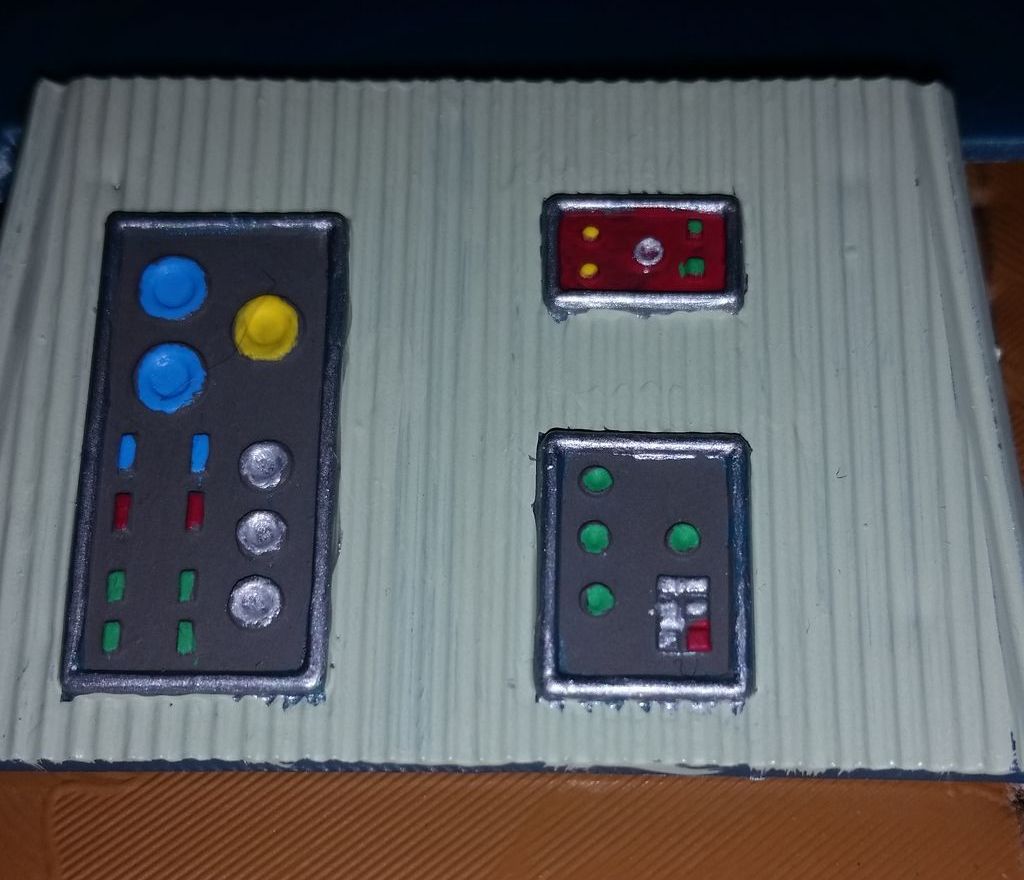
Doing the cockpit was not as much fun as I’d hoped. Sure, there are TONS of after-market decals and lights you can use, and, if you’re really good at painting (I’m not), you could go to town. The stock cockpit is pretty plain though, and the only things I though came out well were the pilot’s seat and the dirt marks I figured would be on the edges:

Since I still have another of these models, maybe I’ll do it up with lights and after-market decals. Some day.
The pilot was one of the more challenging pieces to paint, mainly because of the colors. I did a bit of research on the BSG uniforms and helmets to help out because I thought the instructions were… lacking. Mixing colors is not my forte, but eventually I got some colors that I thought would work. This is also where knowing more about how to work with putty would have been helpful.
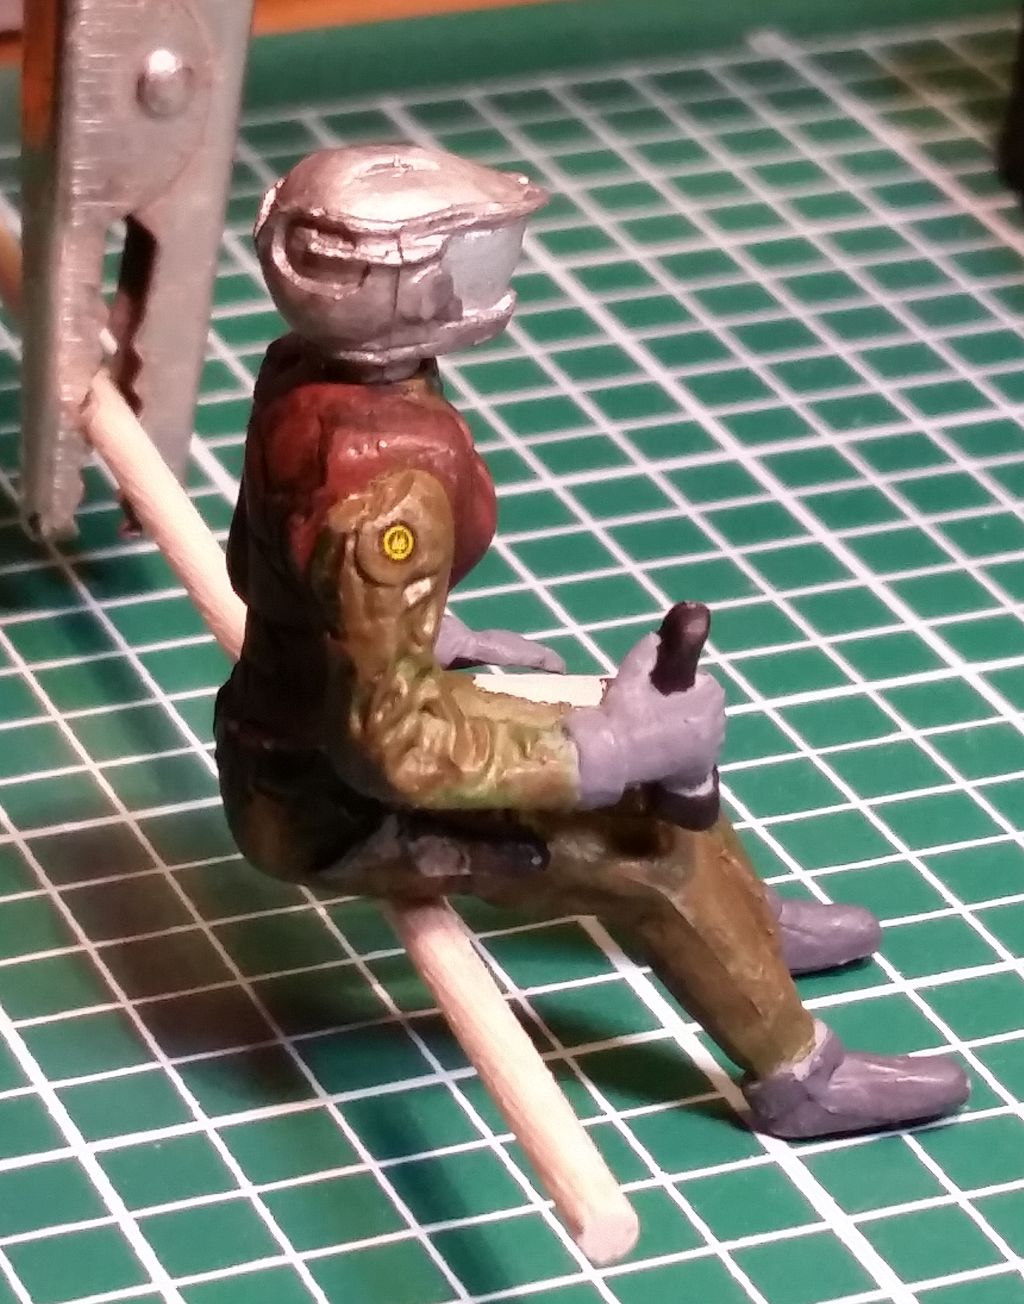
Of course, in one respect, all of the detailing work I did was for naught since you can’t actually see most of it once the pilot is sitting in the cockpit:
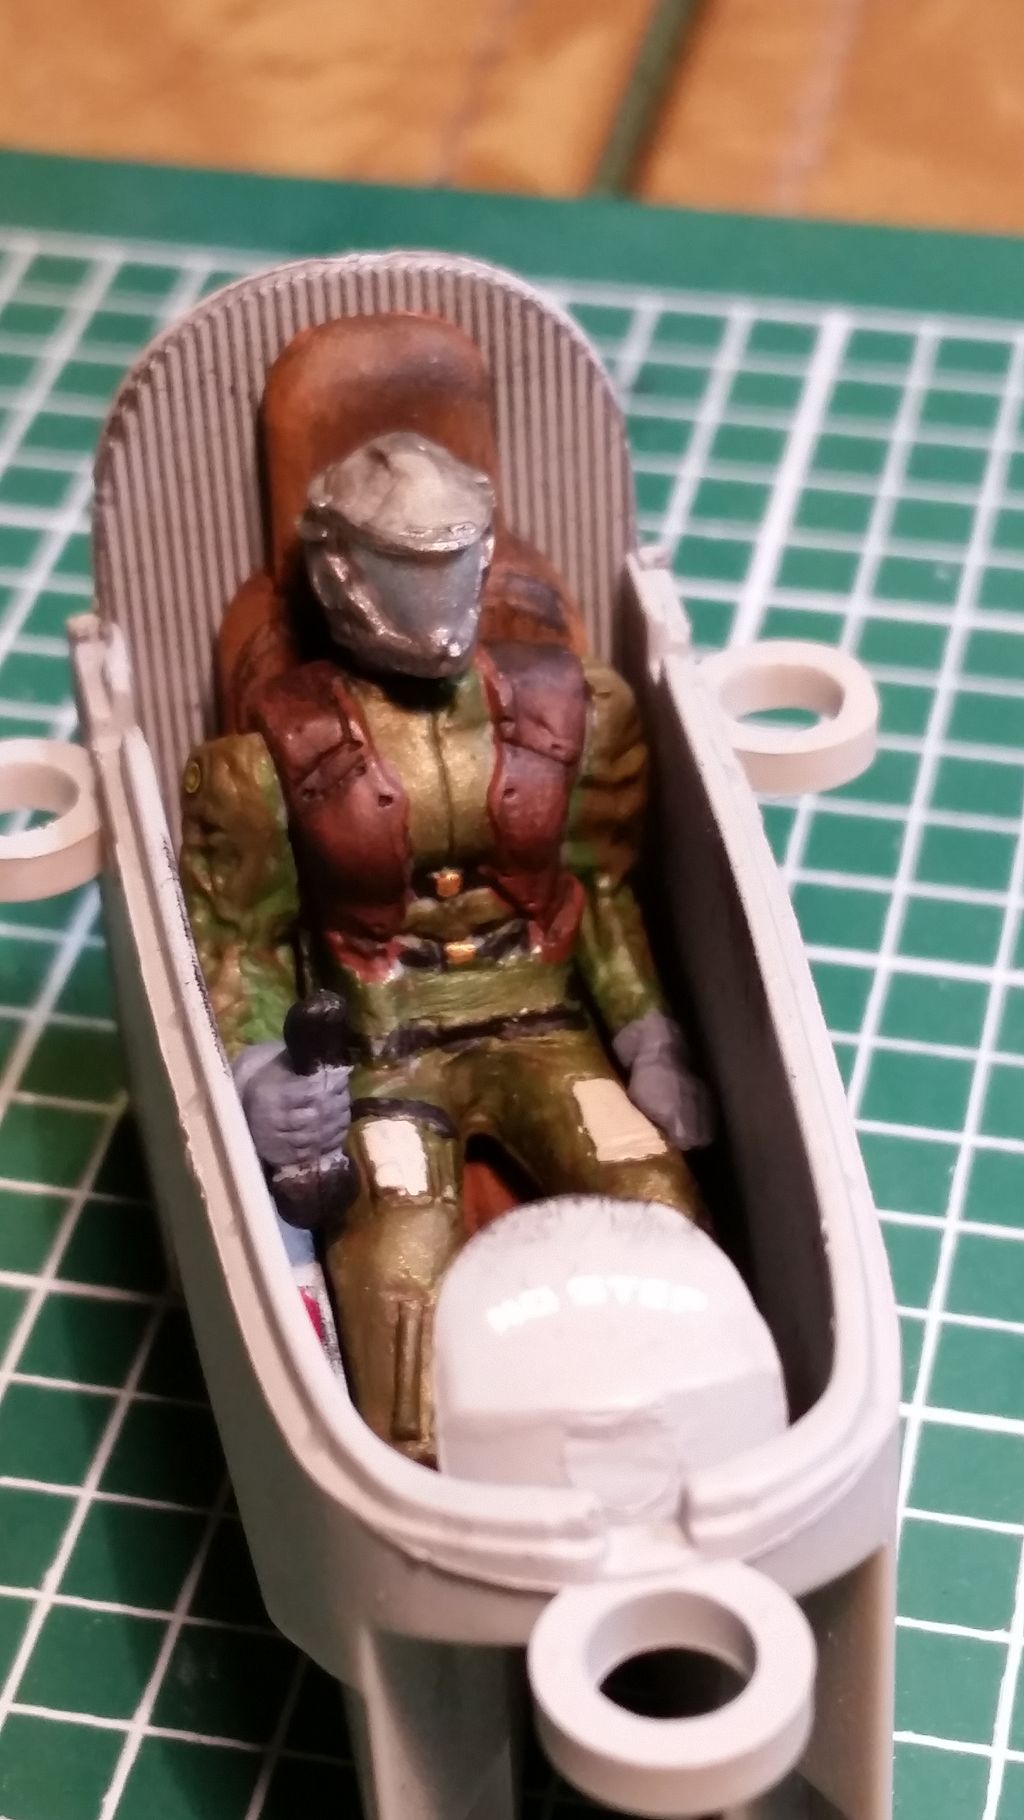 Imagine how much of that you can see once the cockpit is mounted in the ship.
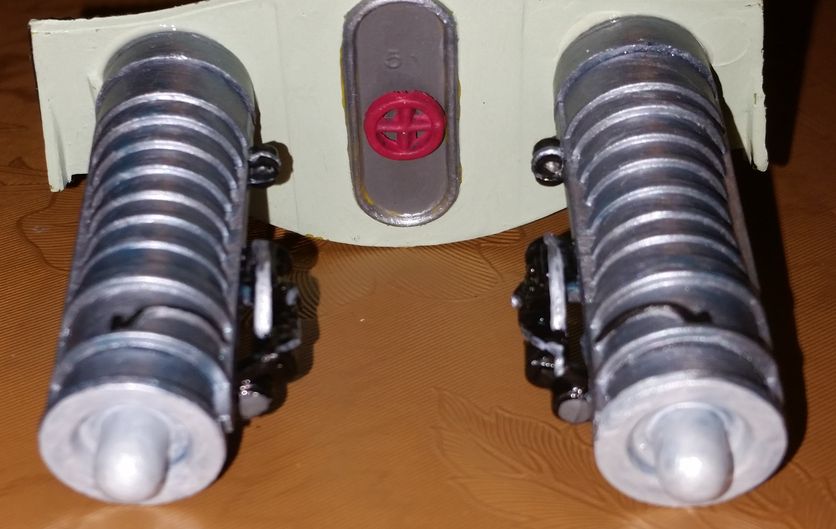
One final adventure of note occurred when I put together the engine cluster. I actually followed the directions, which was a mistake.
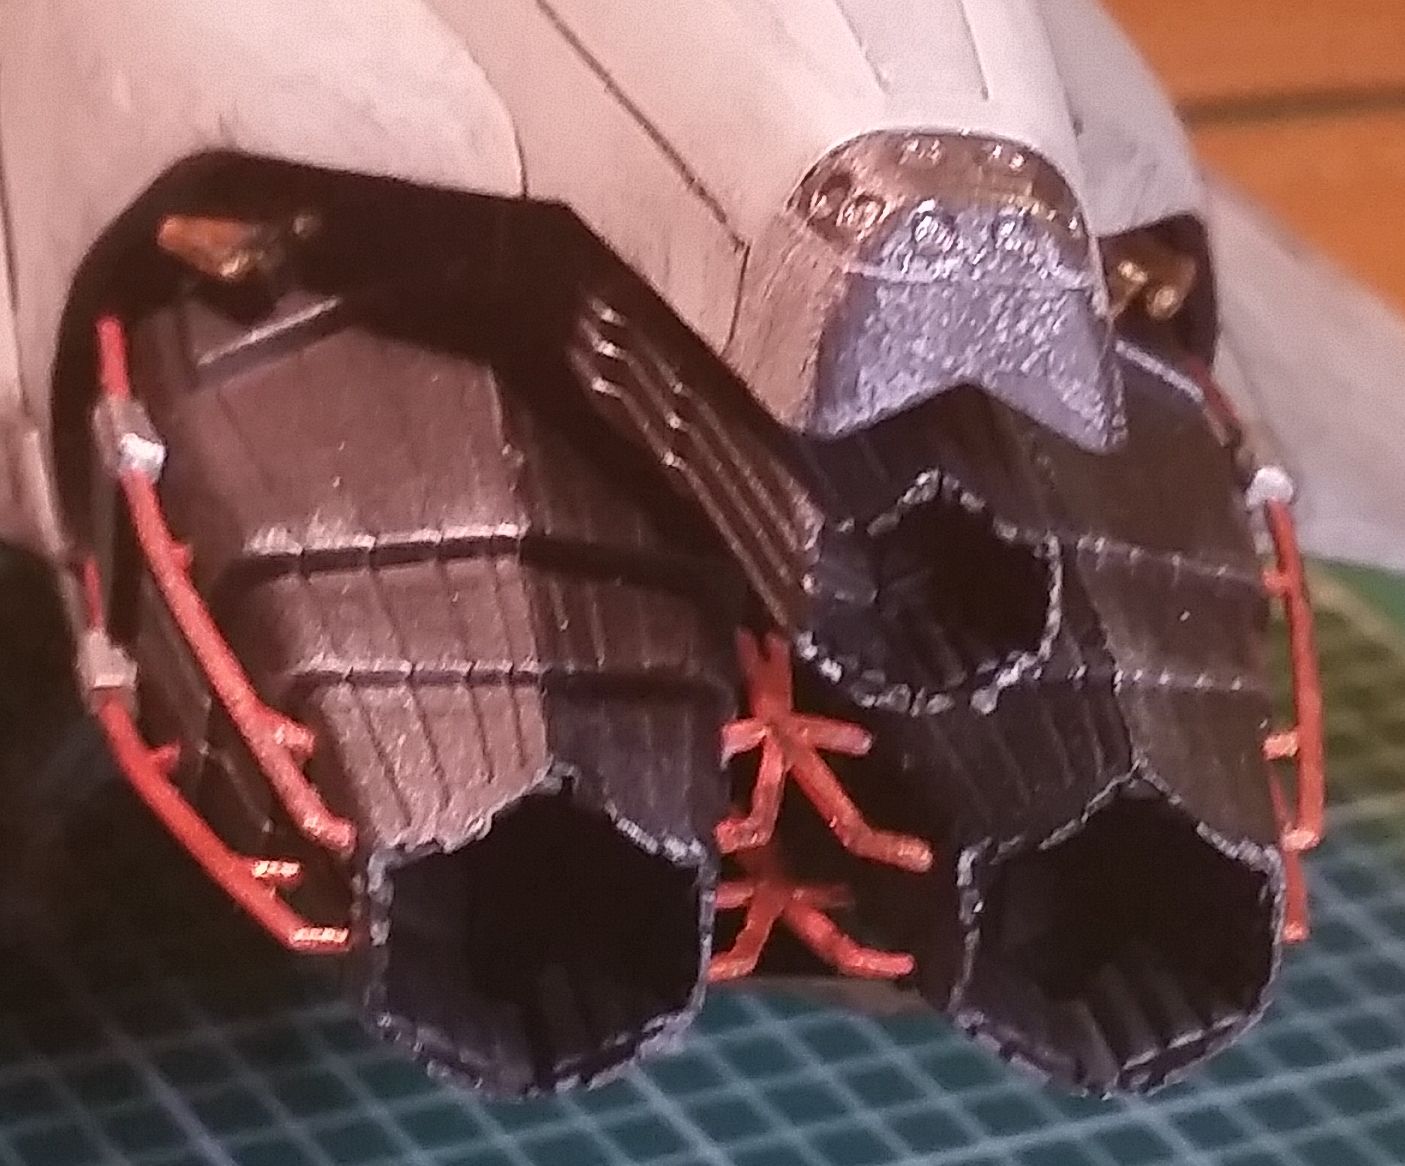 See those copper colored bars between the engines? Yeah, you can’t put those on AFTER you glue together the two bottom pieces. They have to be glued on to one engine and THEN you can glue the engines together. Otherwise there isn’t a way to fit them in there (even with out that top engine added on).
Two other things come to mind about this build. One is that the landing gear didn’t fit right. I mean, it fit inside the provided holes nice and tightly, and originally I planned to display the model without the stand. But then I discovered this:
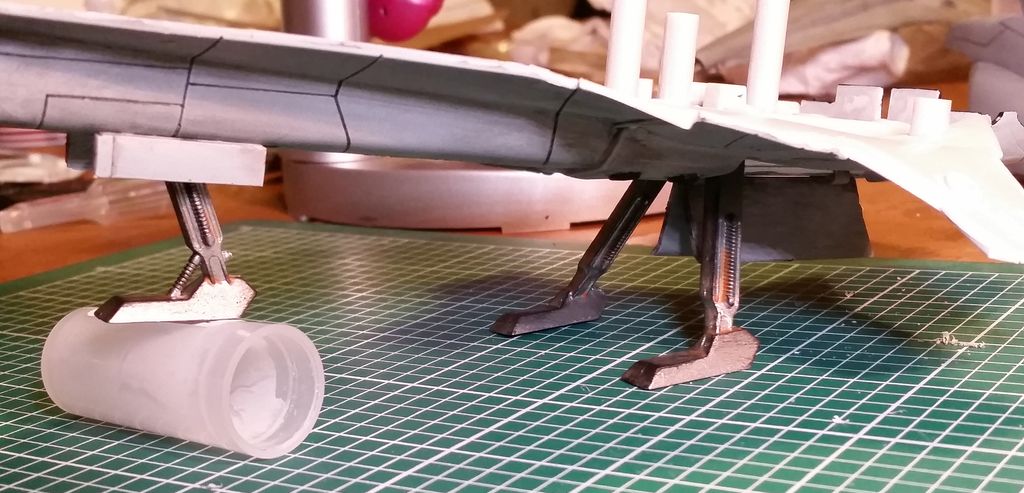
So I ended up putting the model on the stand after all.
The other thing that proved problematical was that the model is unbalanced. Even if the skids had been level, once everything is together the tail end of the model is very heavy and the whole thing tips backwards as soon as you set it down. My takeaway there was to put clay or putty inside the front end of the next one so it will sit right.
All in all, I didn’t think the model was too bad for a first attempt. It was also a fun build and I learned a bunch while building it. To see all of the pictures, jump on over to the Gallery!