Building the Level 1 Revell “The Force Awakens” X-Wing

Star War is, obviously, quite popular and while it’s not my absolute favorite, I’ve had a long standing love for the X-Wing Fighters. I wasn’t overly amused by the JJ-ization of the new X-Wing, but it wasn’t as bad as some of his other stuff, and I was very eager to get my hands on a Bandai X-Wing from the new movie. I won’t go into the whole thing about the Bandai Ban, but I was kinda pissed, especially after seeing first hand the quality of the other Bandai models in my stash.

Anyway, then came The Force Awakens toy day, or whatever that was, and I thought what the heck, I’ll go and get one of the Revell X-Wings. I was a bit surprised that the only thing out was a level one model. Other modelers were more than a little pissed, but since I’m not the most experienced of modelers I took it as an opportunity for me to practice painting up what was clearly more of a toy than a model.

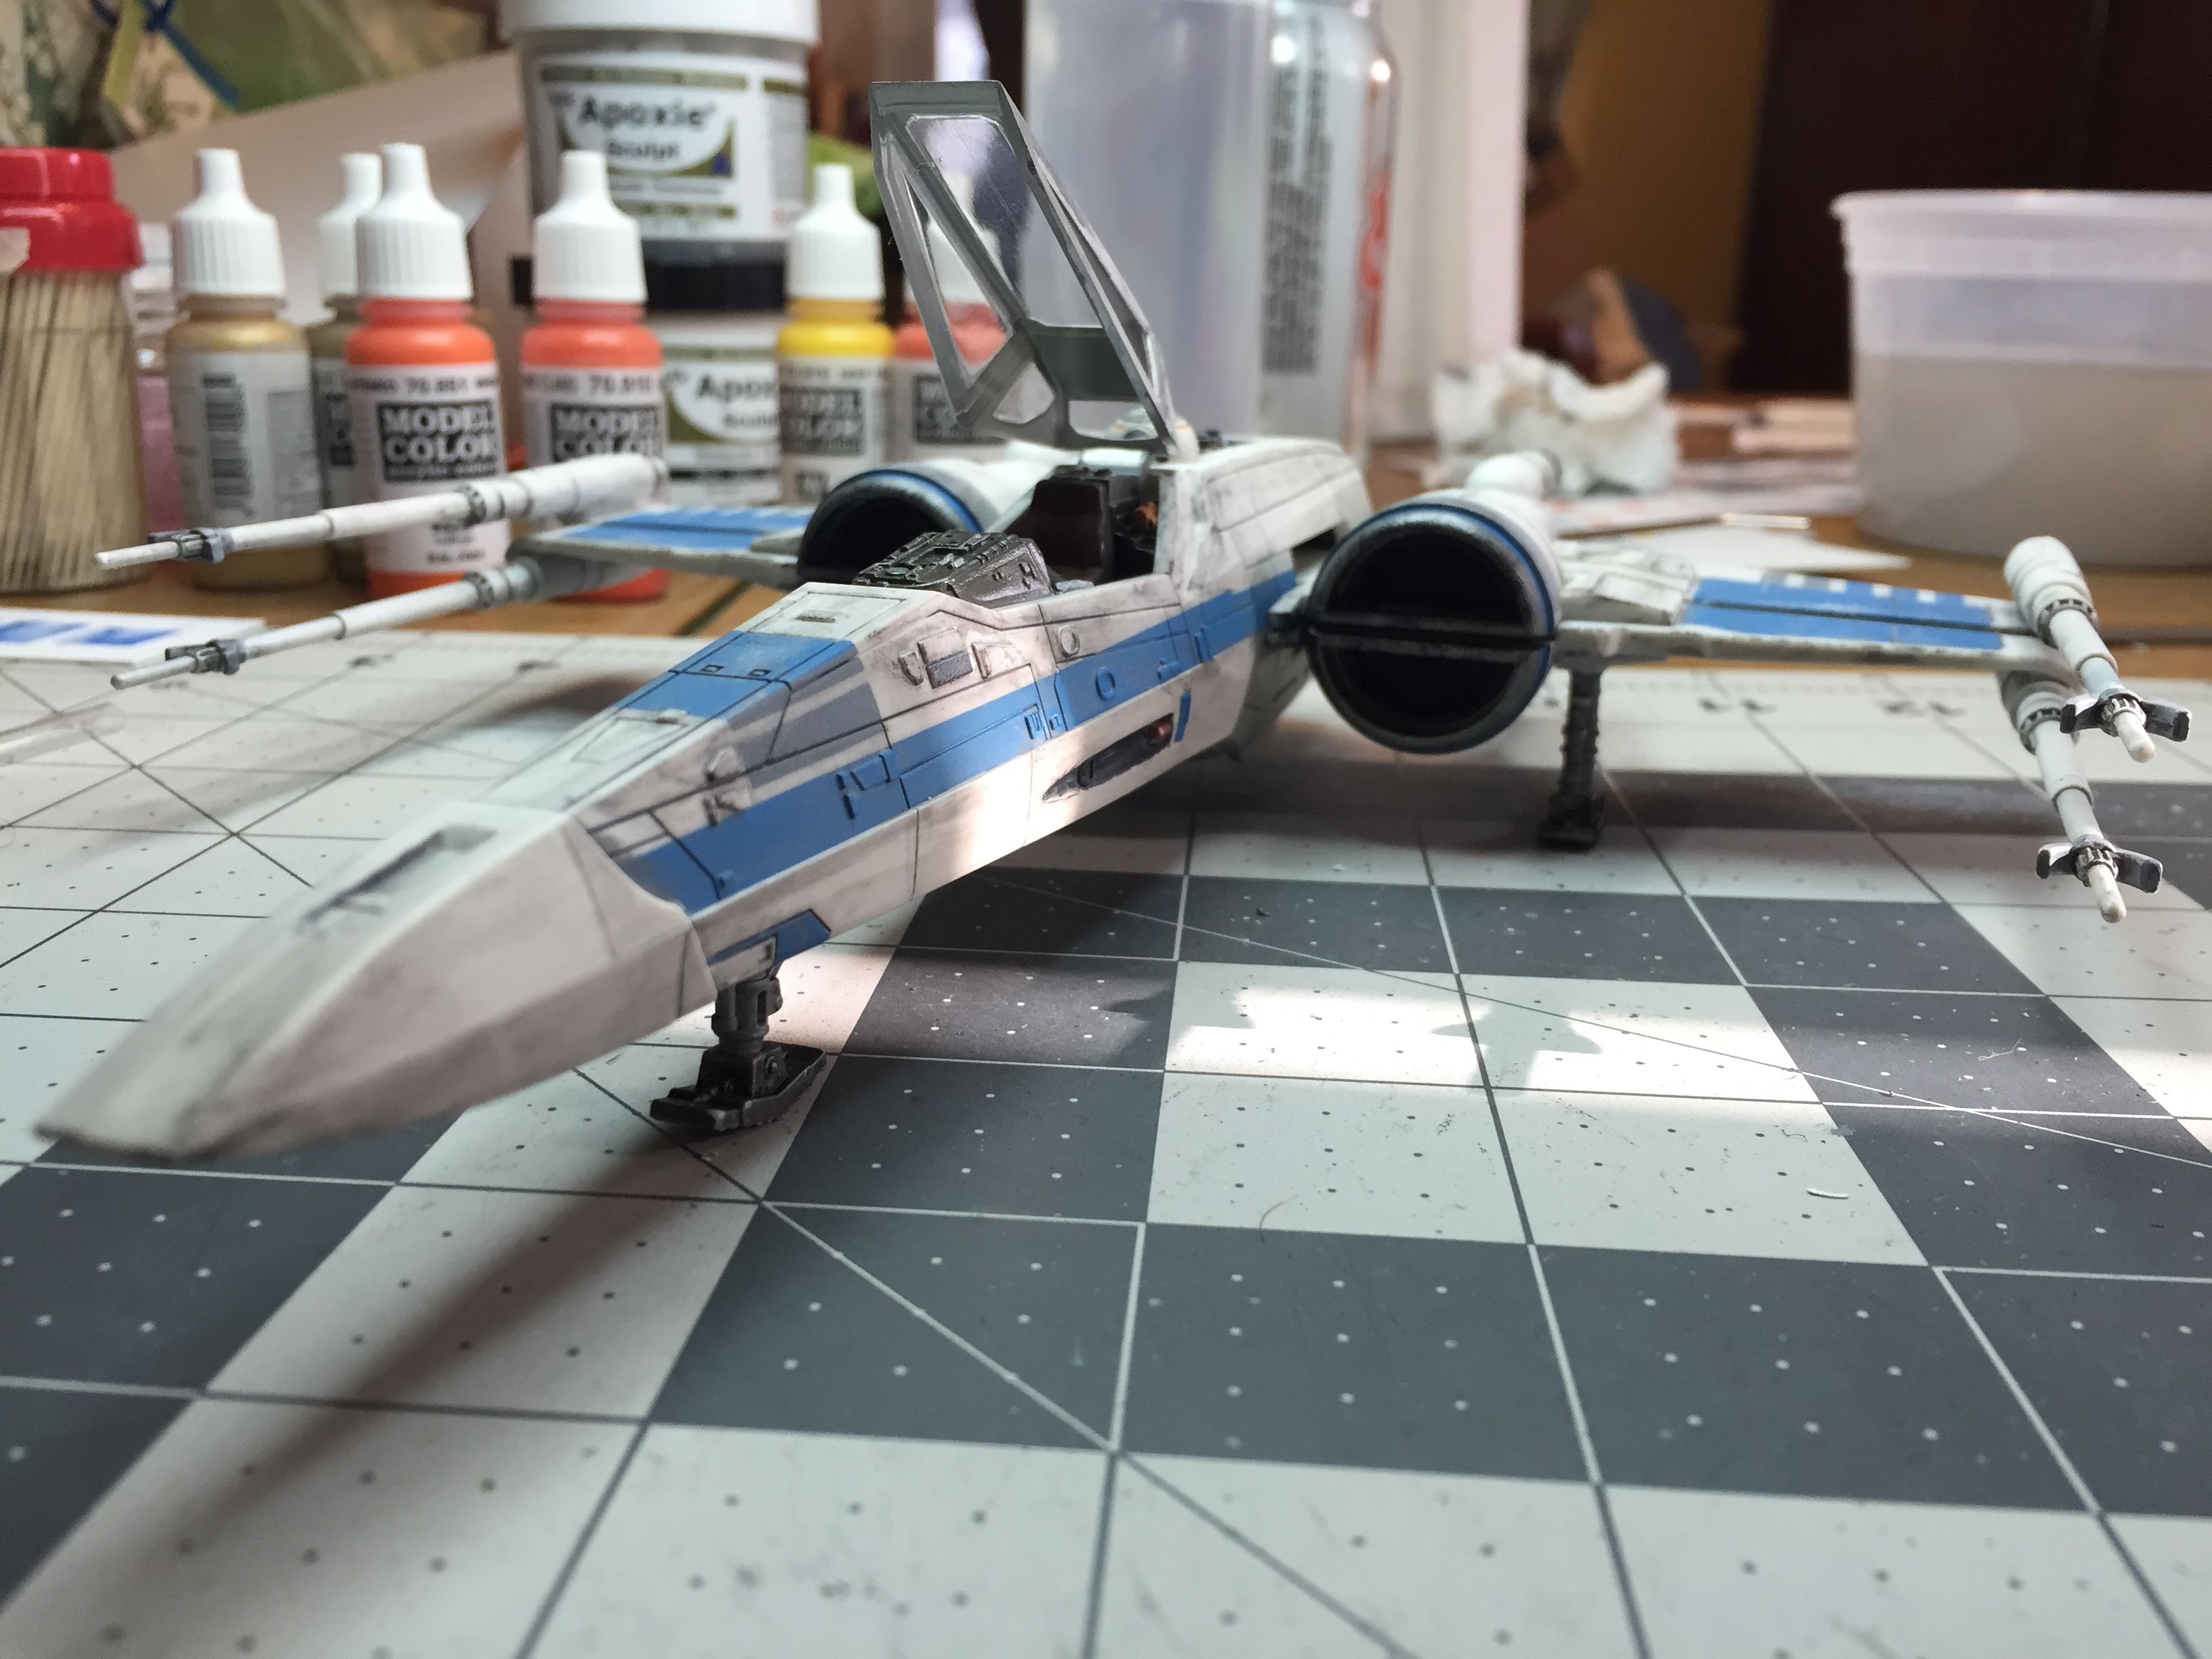
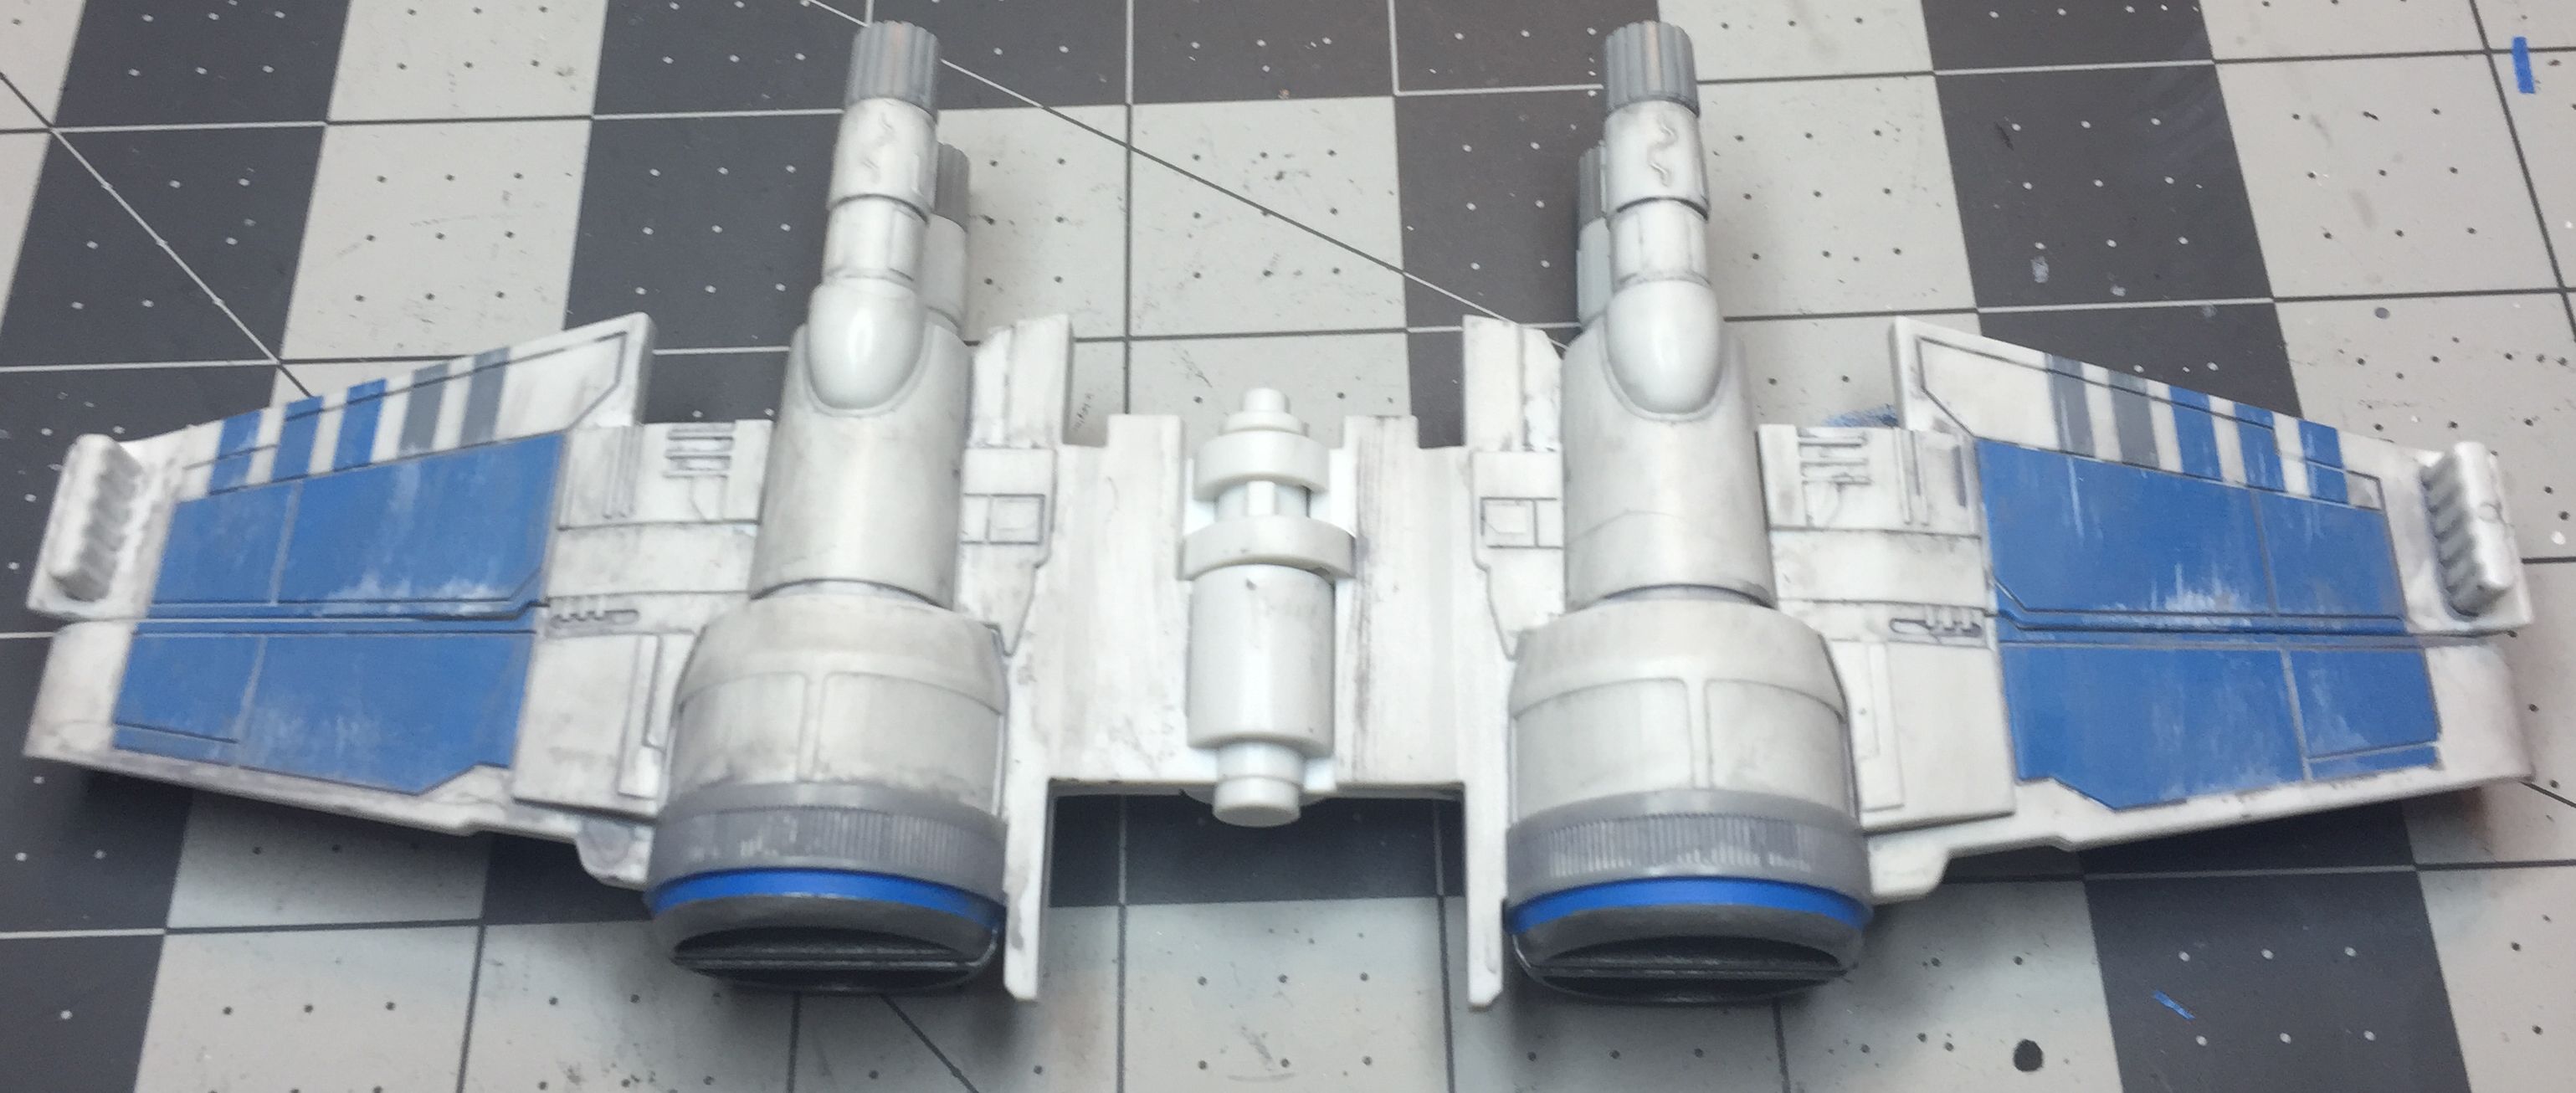
To start with, these pictures are what you get out of the box:

StockBox

TheParts

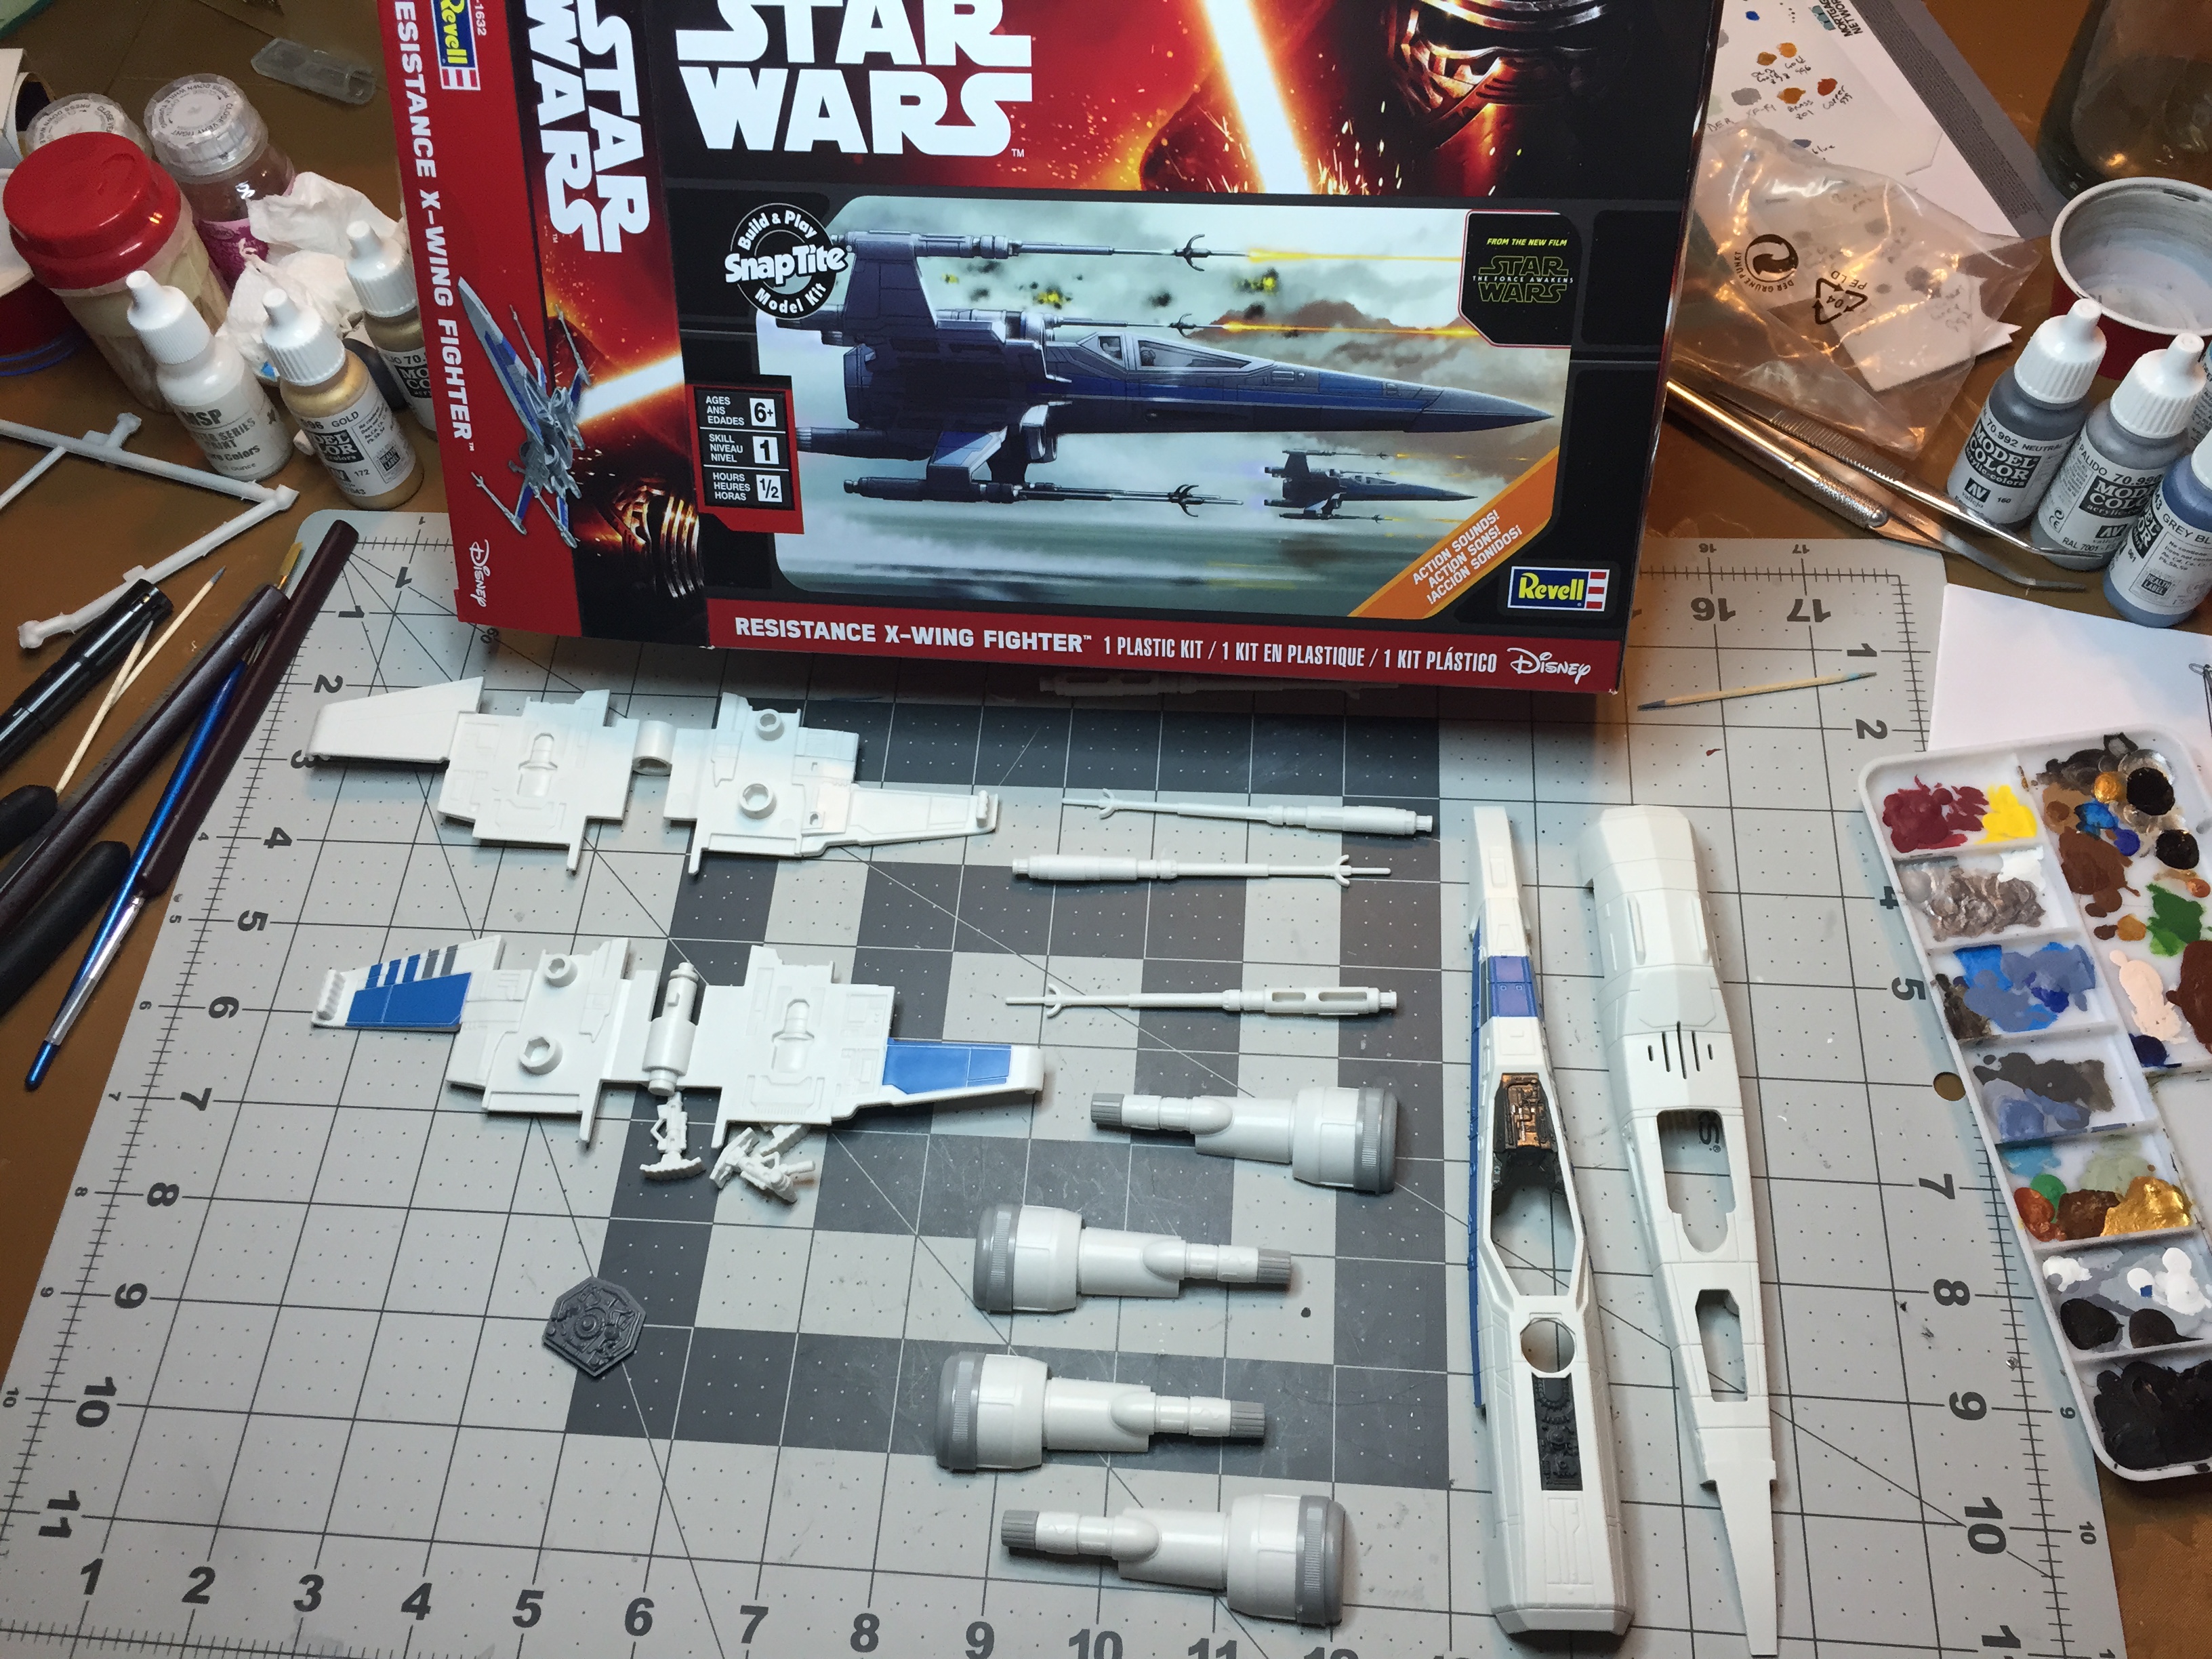
Not a whole heck of a lot, and, in fact, as I commented on Facebook, the thing would probably take about five minutes to put together — and that’s if you stopped to eat a cupcake along the way. Still, as someone who really needs panting practice, it was a fine opportunity for me to do just that on an inexpensive model.

The first thing I noticed was that there were not a lot of diverse sources of research material — no surprise as at the time of the build, the movie was still over a moth away. I did find a couple of decent pics so I went with those.

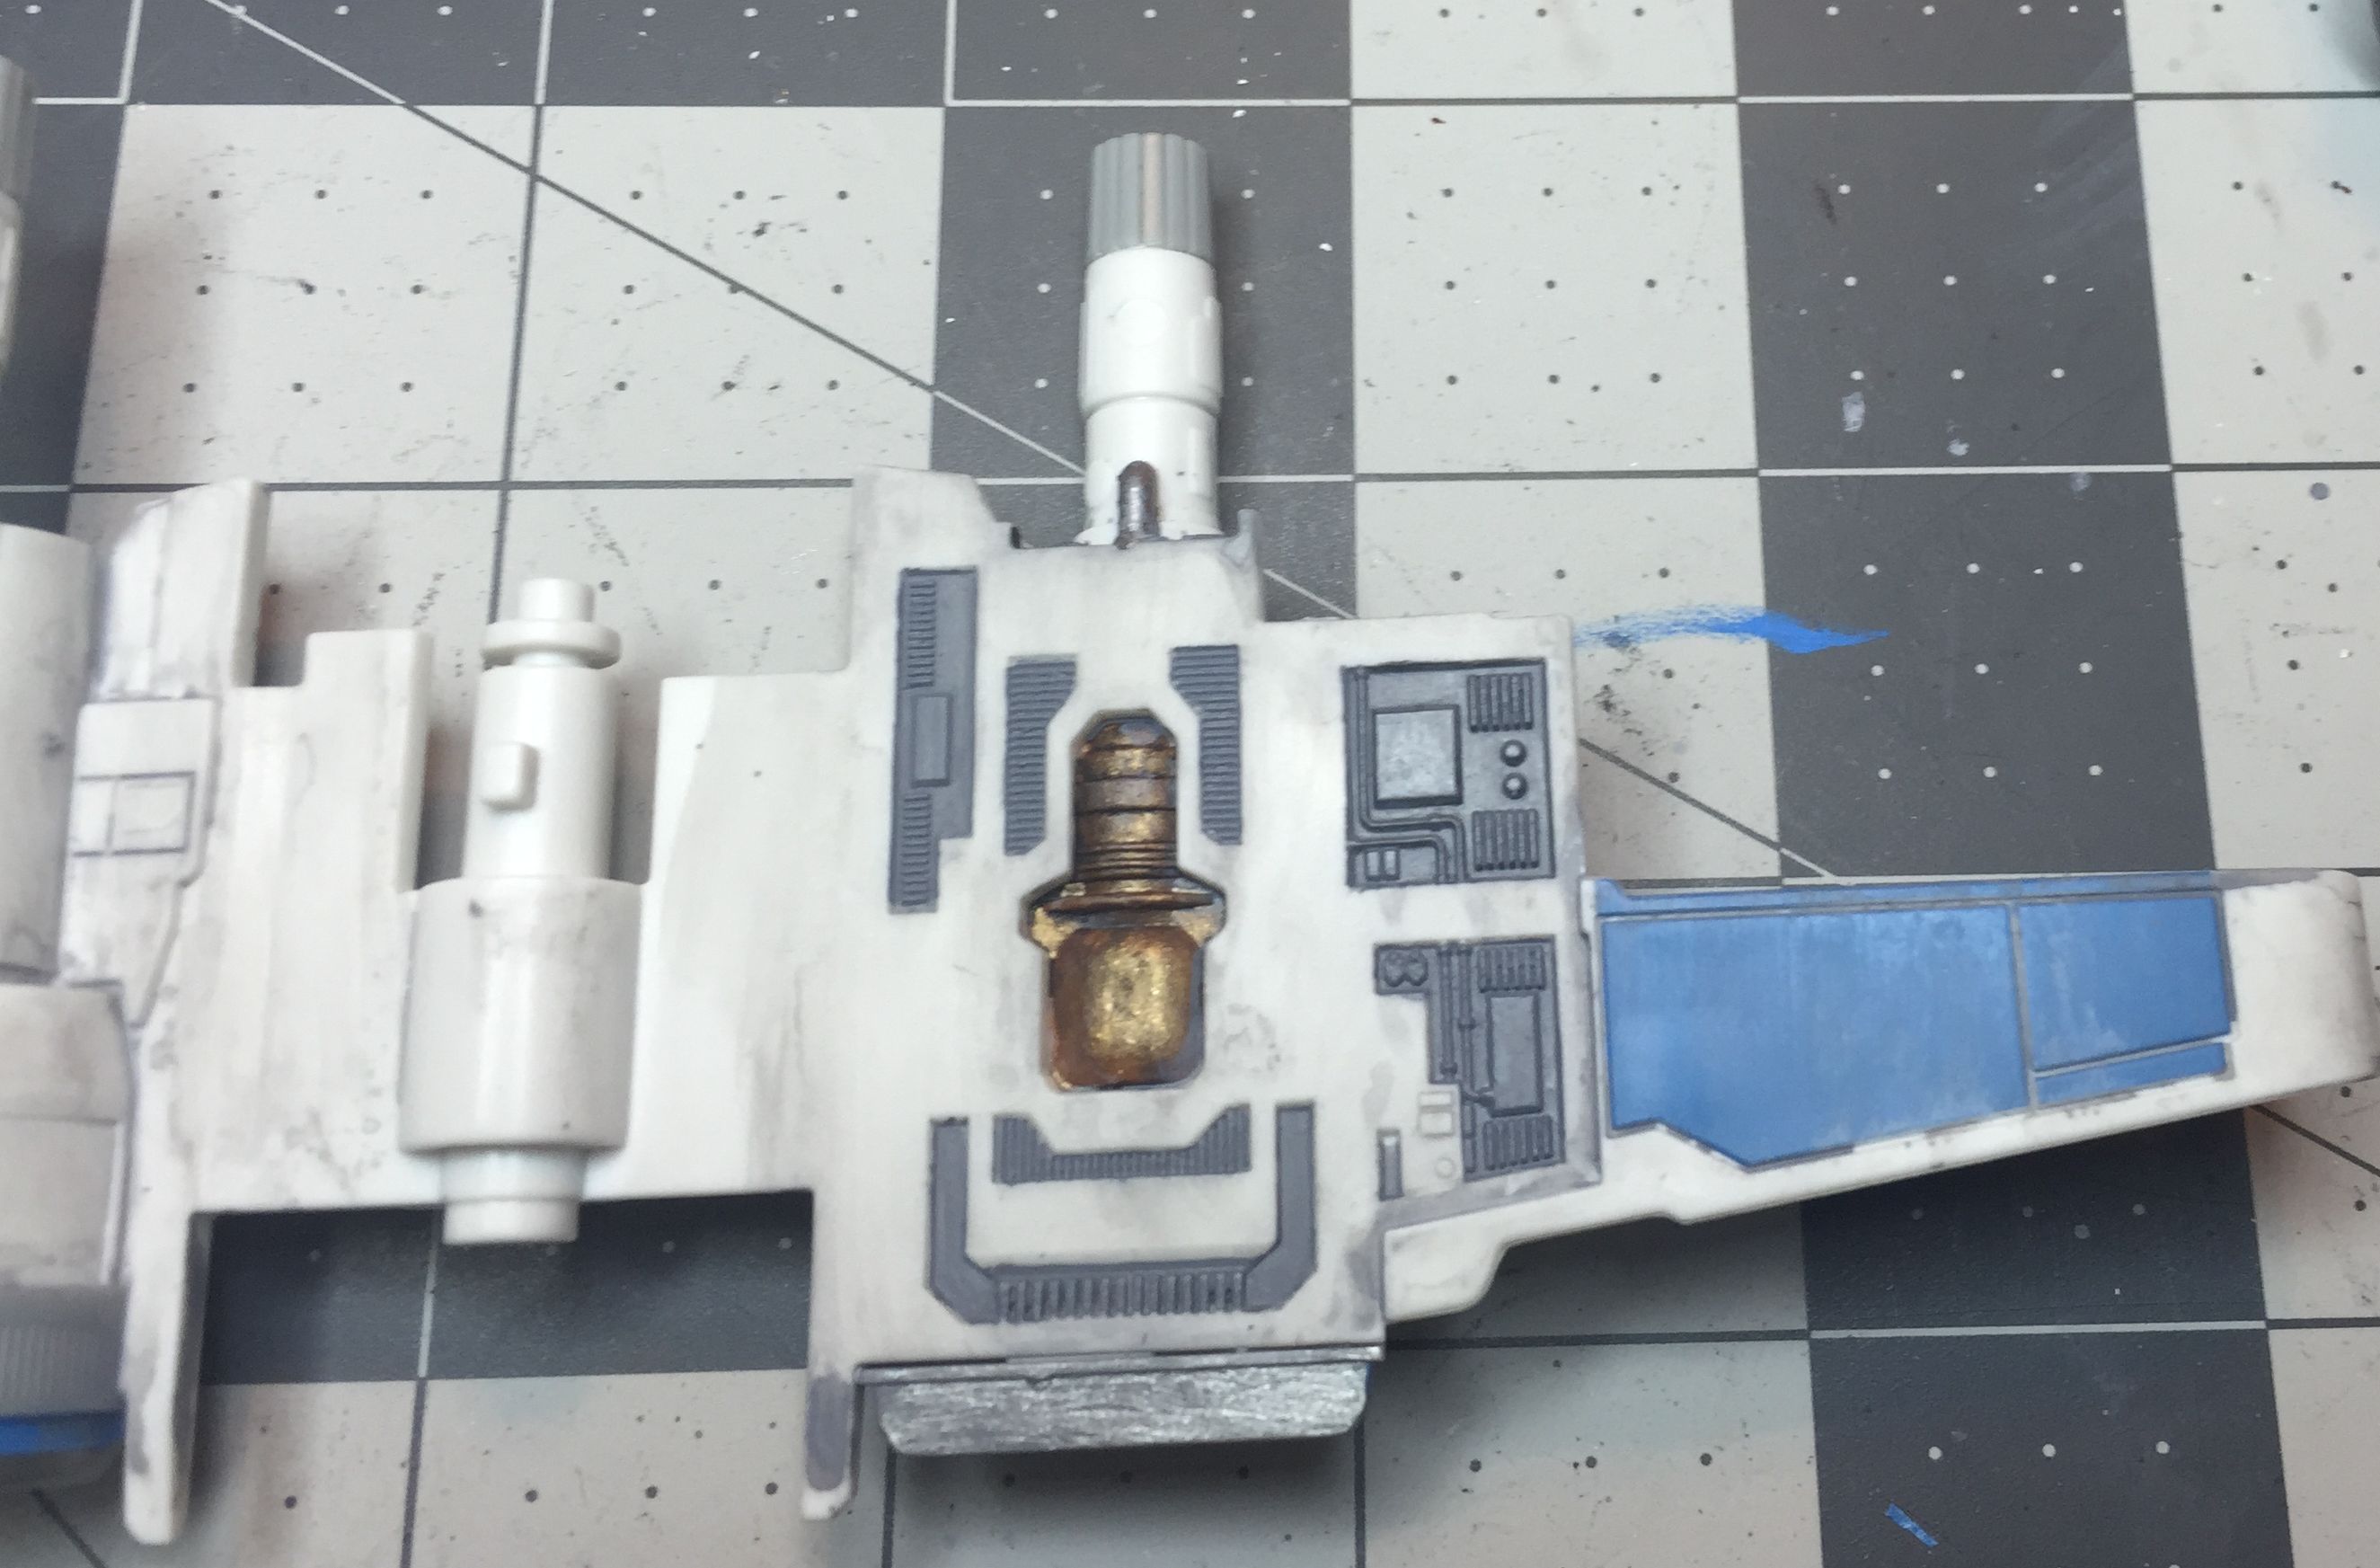
One of the first things I did, was spend a bit of time matching the blue paint. Once I had something I thought was pretty close I decided to go off-book, so to speak, and add a wee bit of color to a few places.

BodyBlue

AddingBluePaint

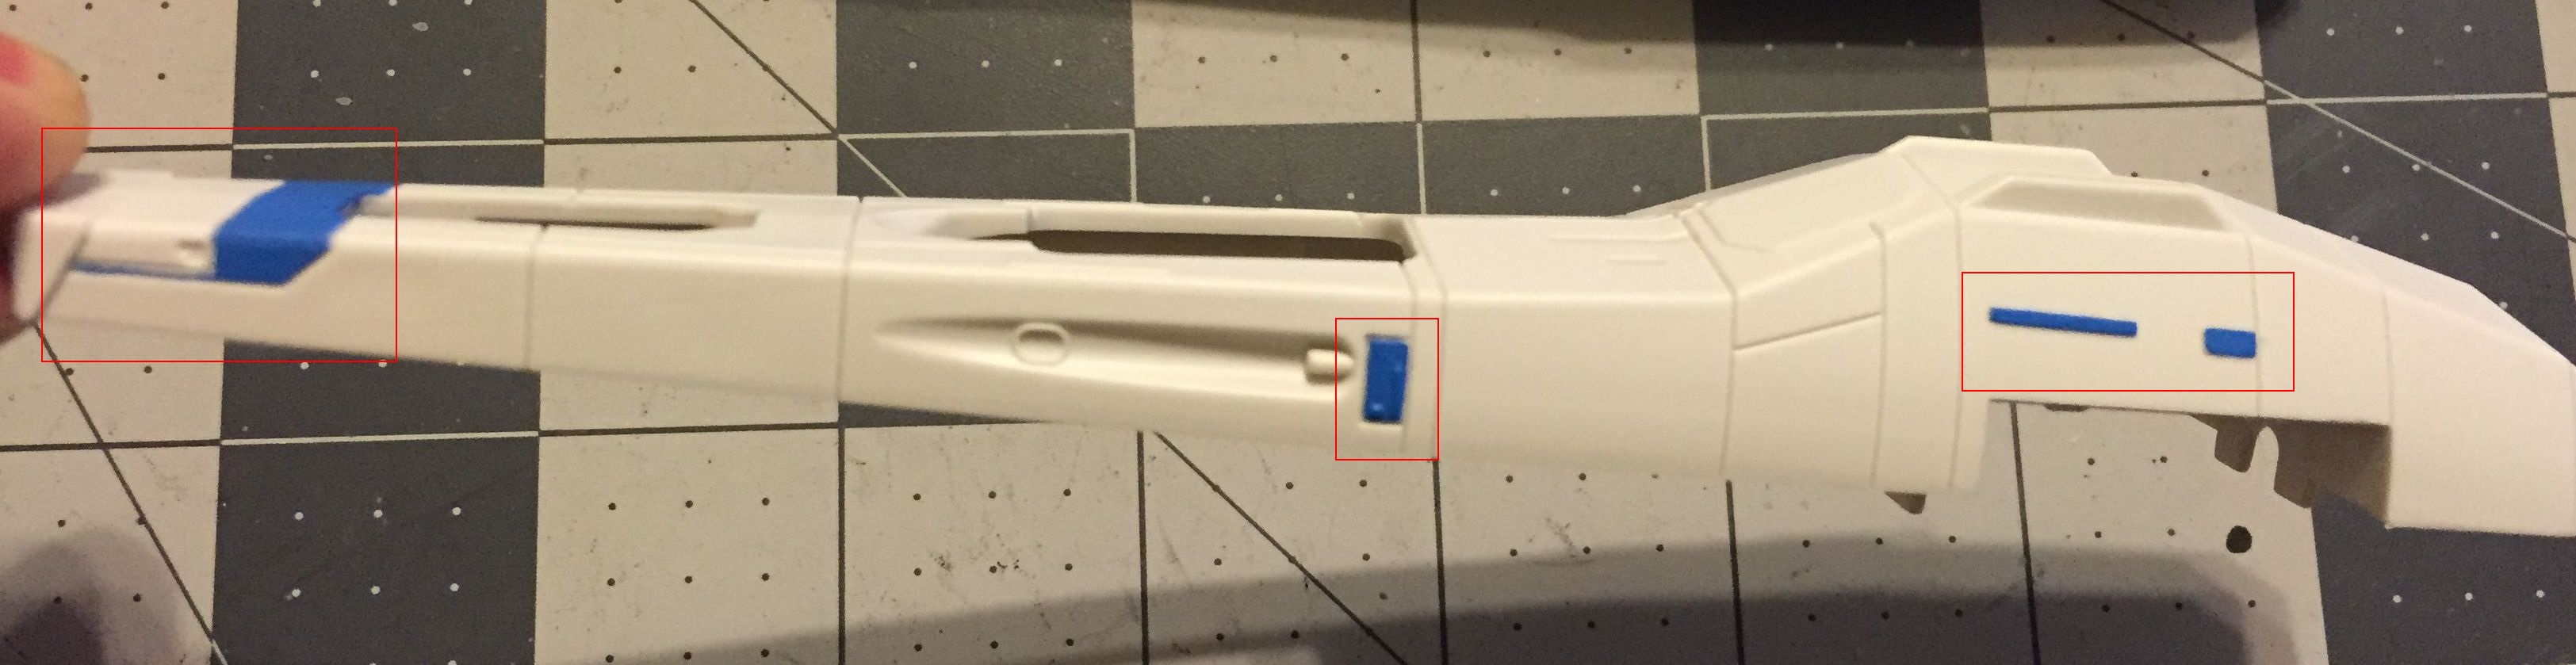
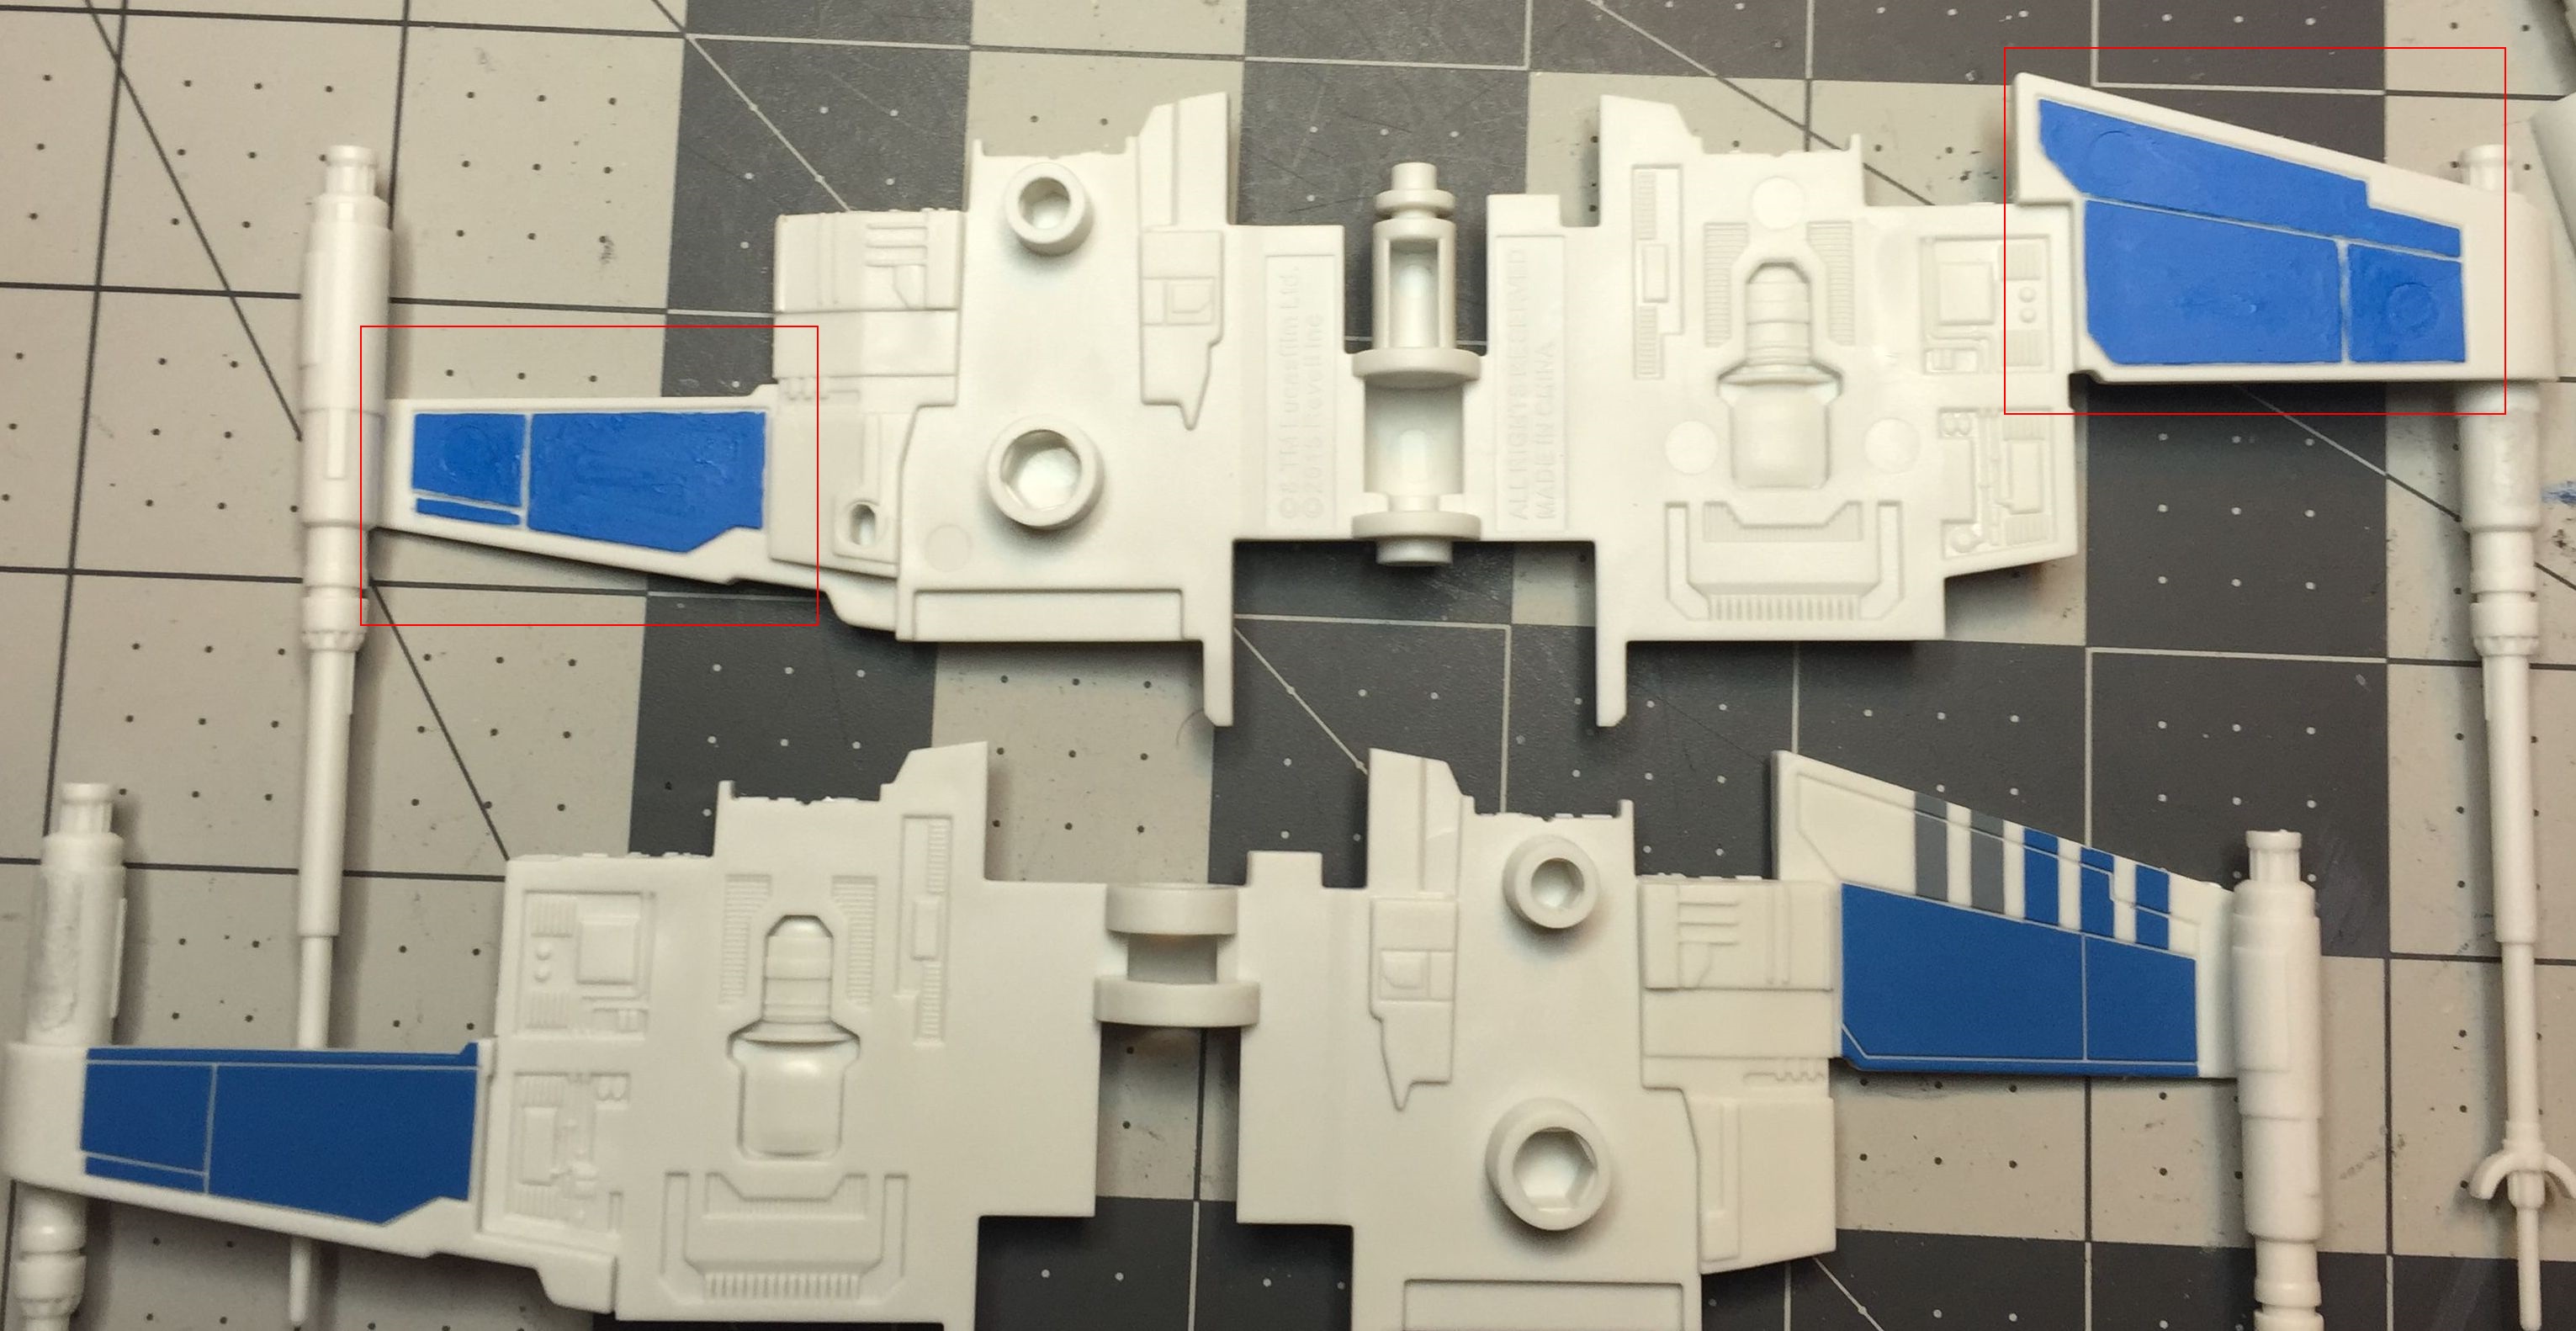
(The areas I added are in the red boxes)

I also added a touch of grey paint on the top of the body later on just because. I’ll leave it to the viewer to find them.

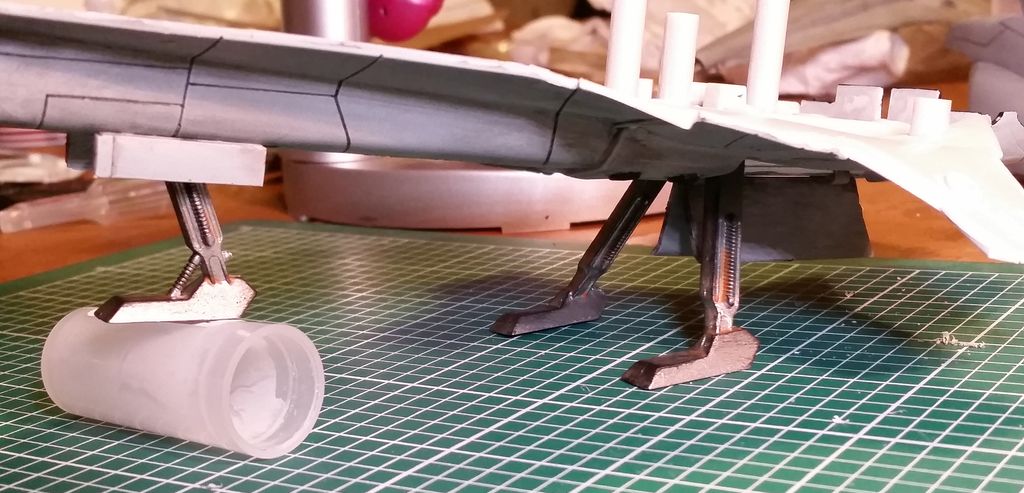
The lasers at the end of the wings were designed so that they could be put in any slot. This left big, gaping holes in the things once they were installed, so I took care of that with some putty. It wasn’t the greatest putty job, but it wasn’t very noticeable once everything was painted up and weathered. Also, I wanted to try out a new type of putty (Apoxy Sculpt), and I’m happy to say not only did it work well, but it was pretty easy to work with.

LazerComp3

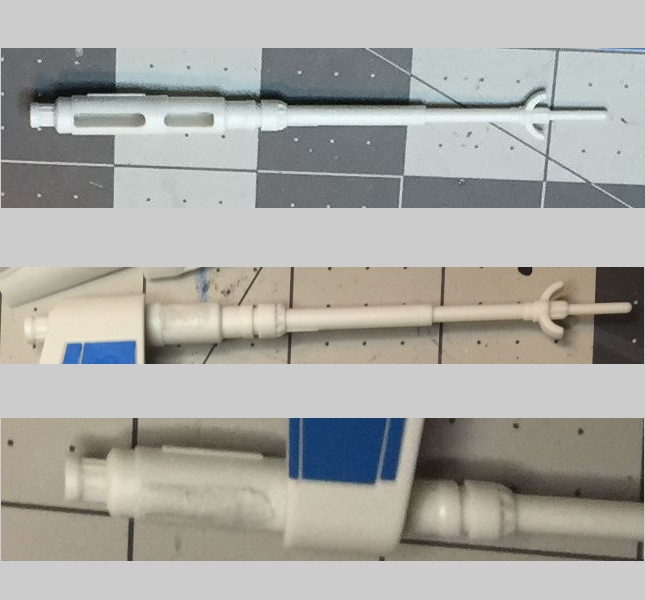
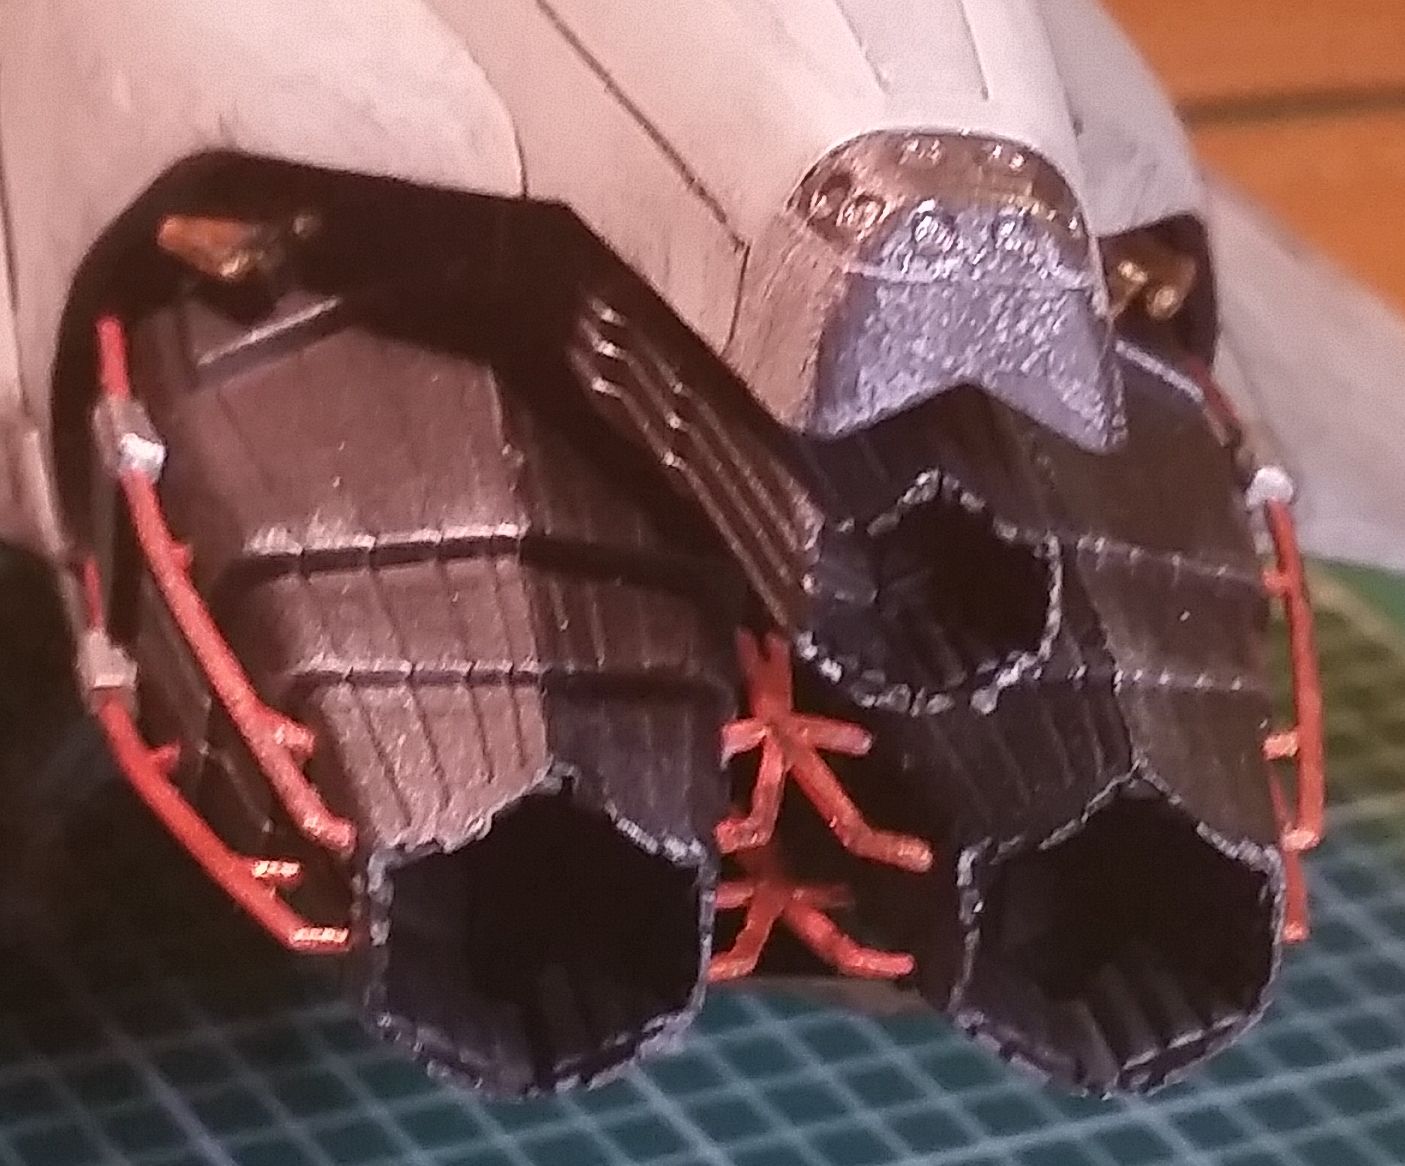
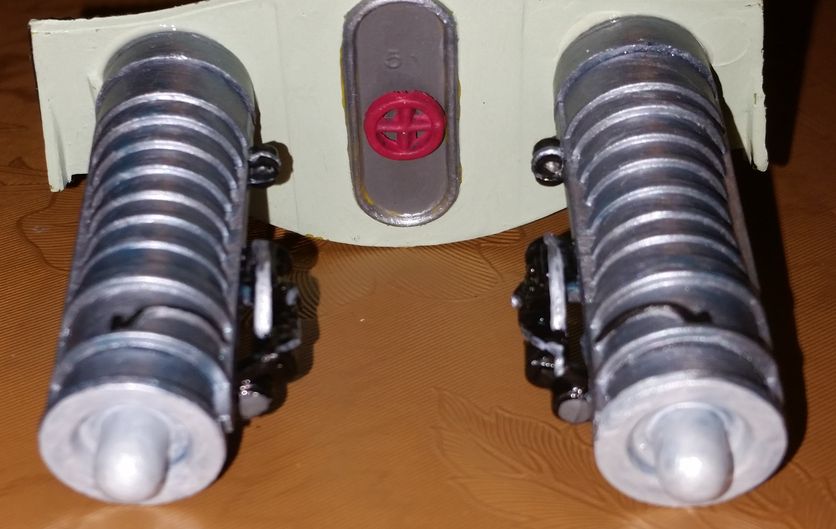
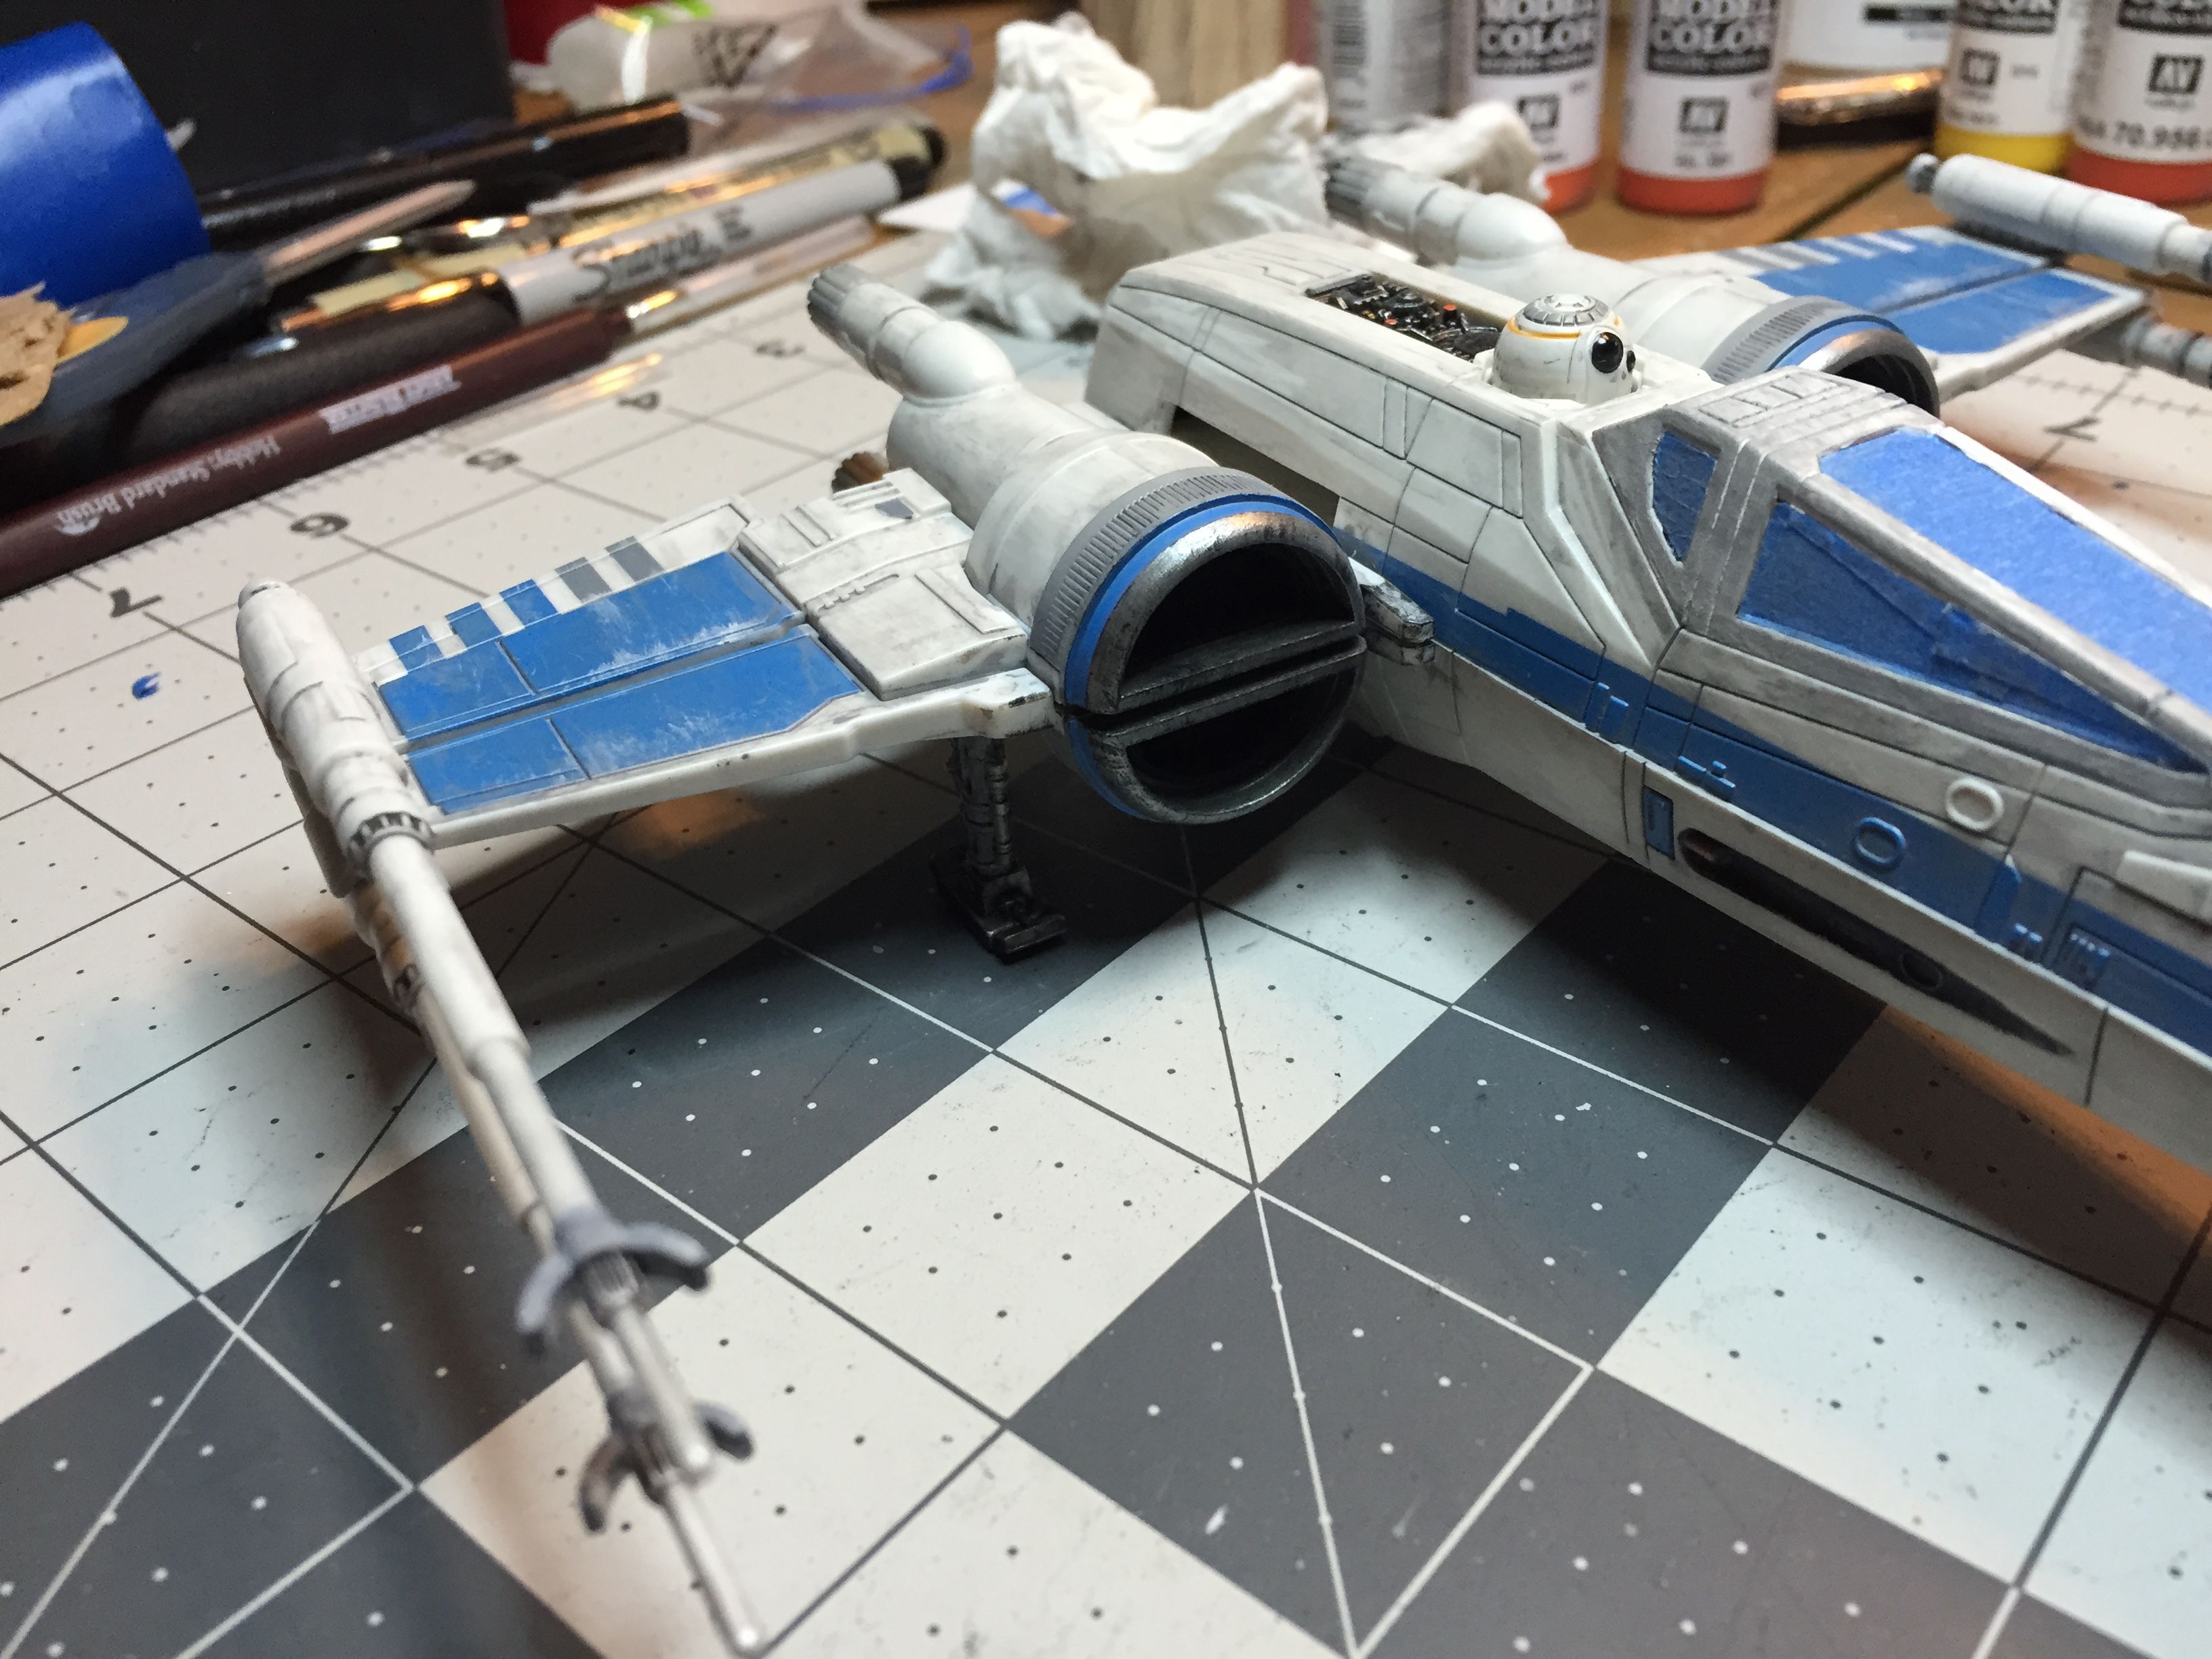
Here are some close ups of the intake work that I did.

IntakeBlue

IntakeSilver

IntakeInterior

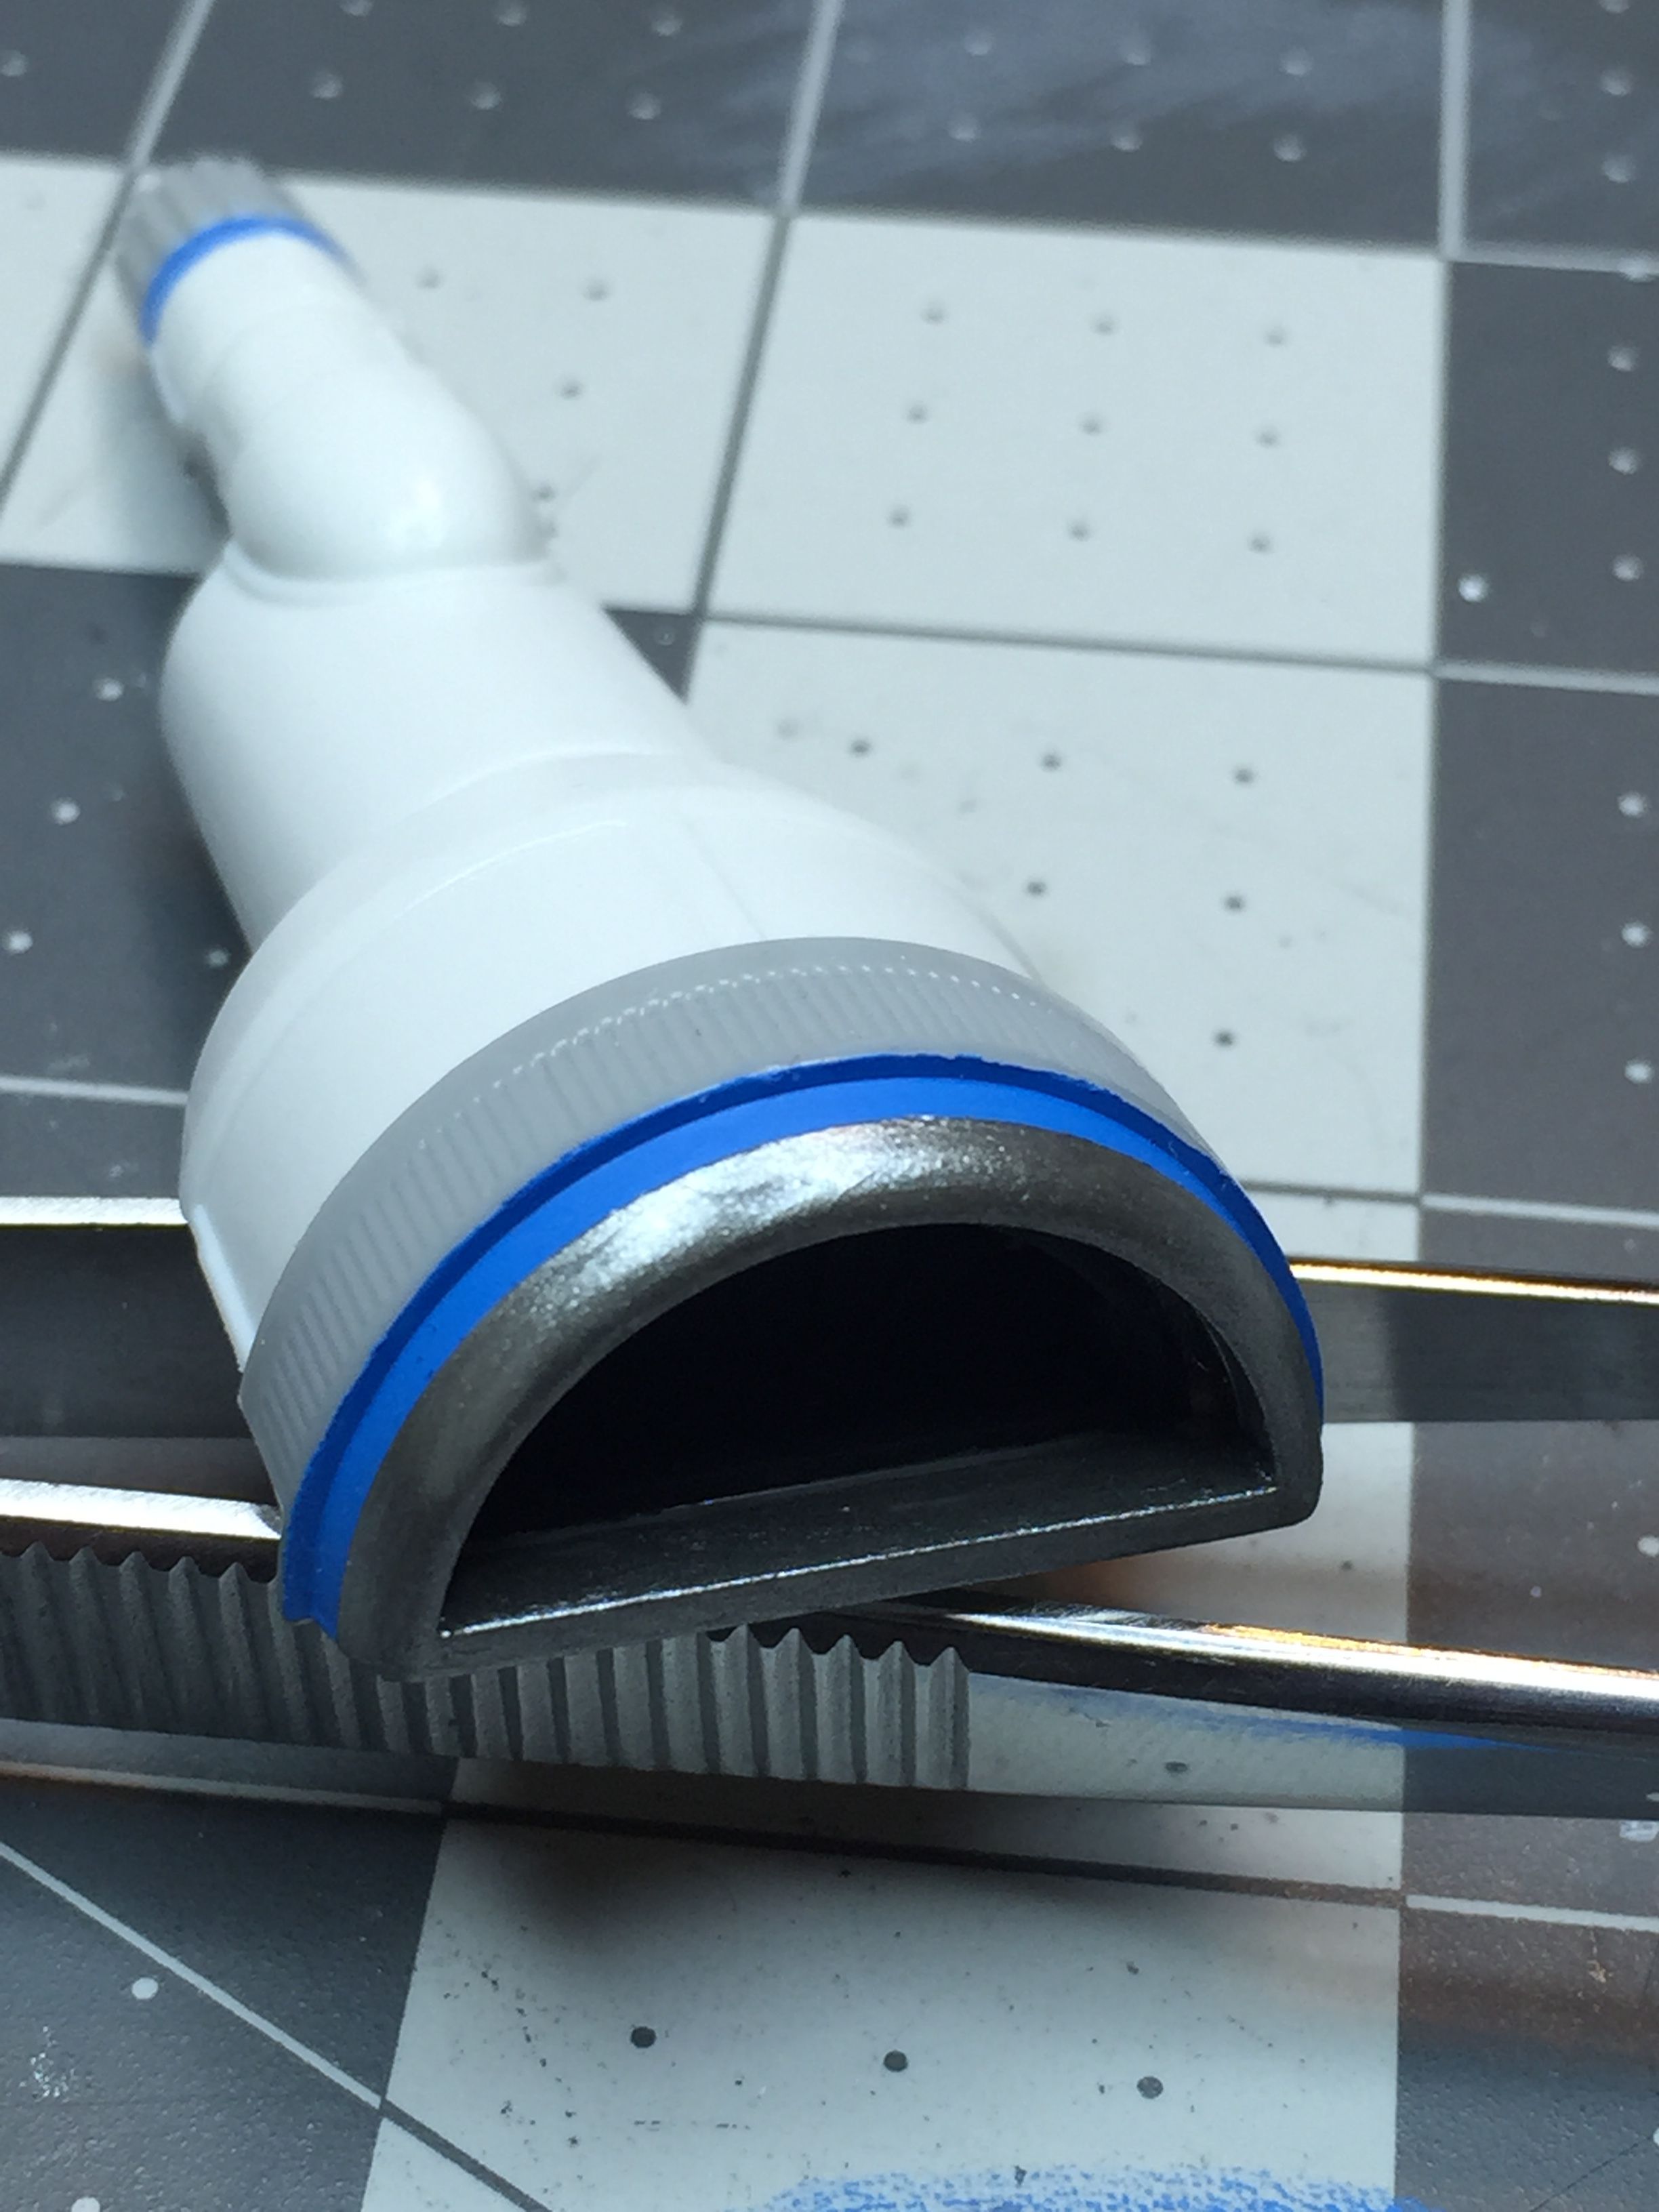
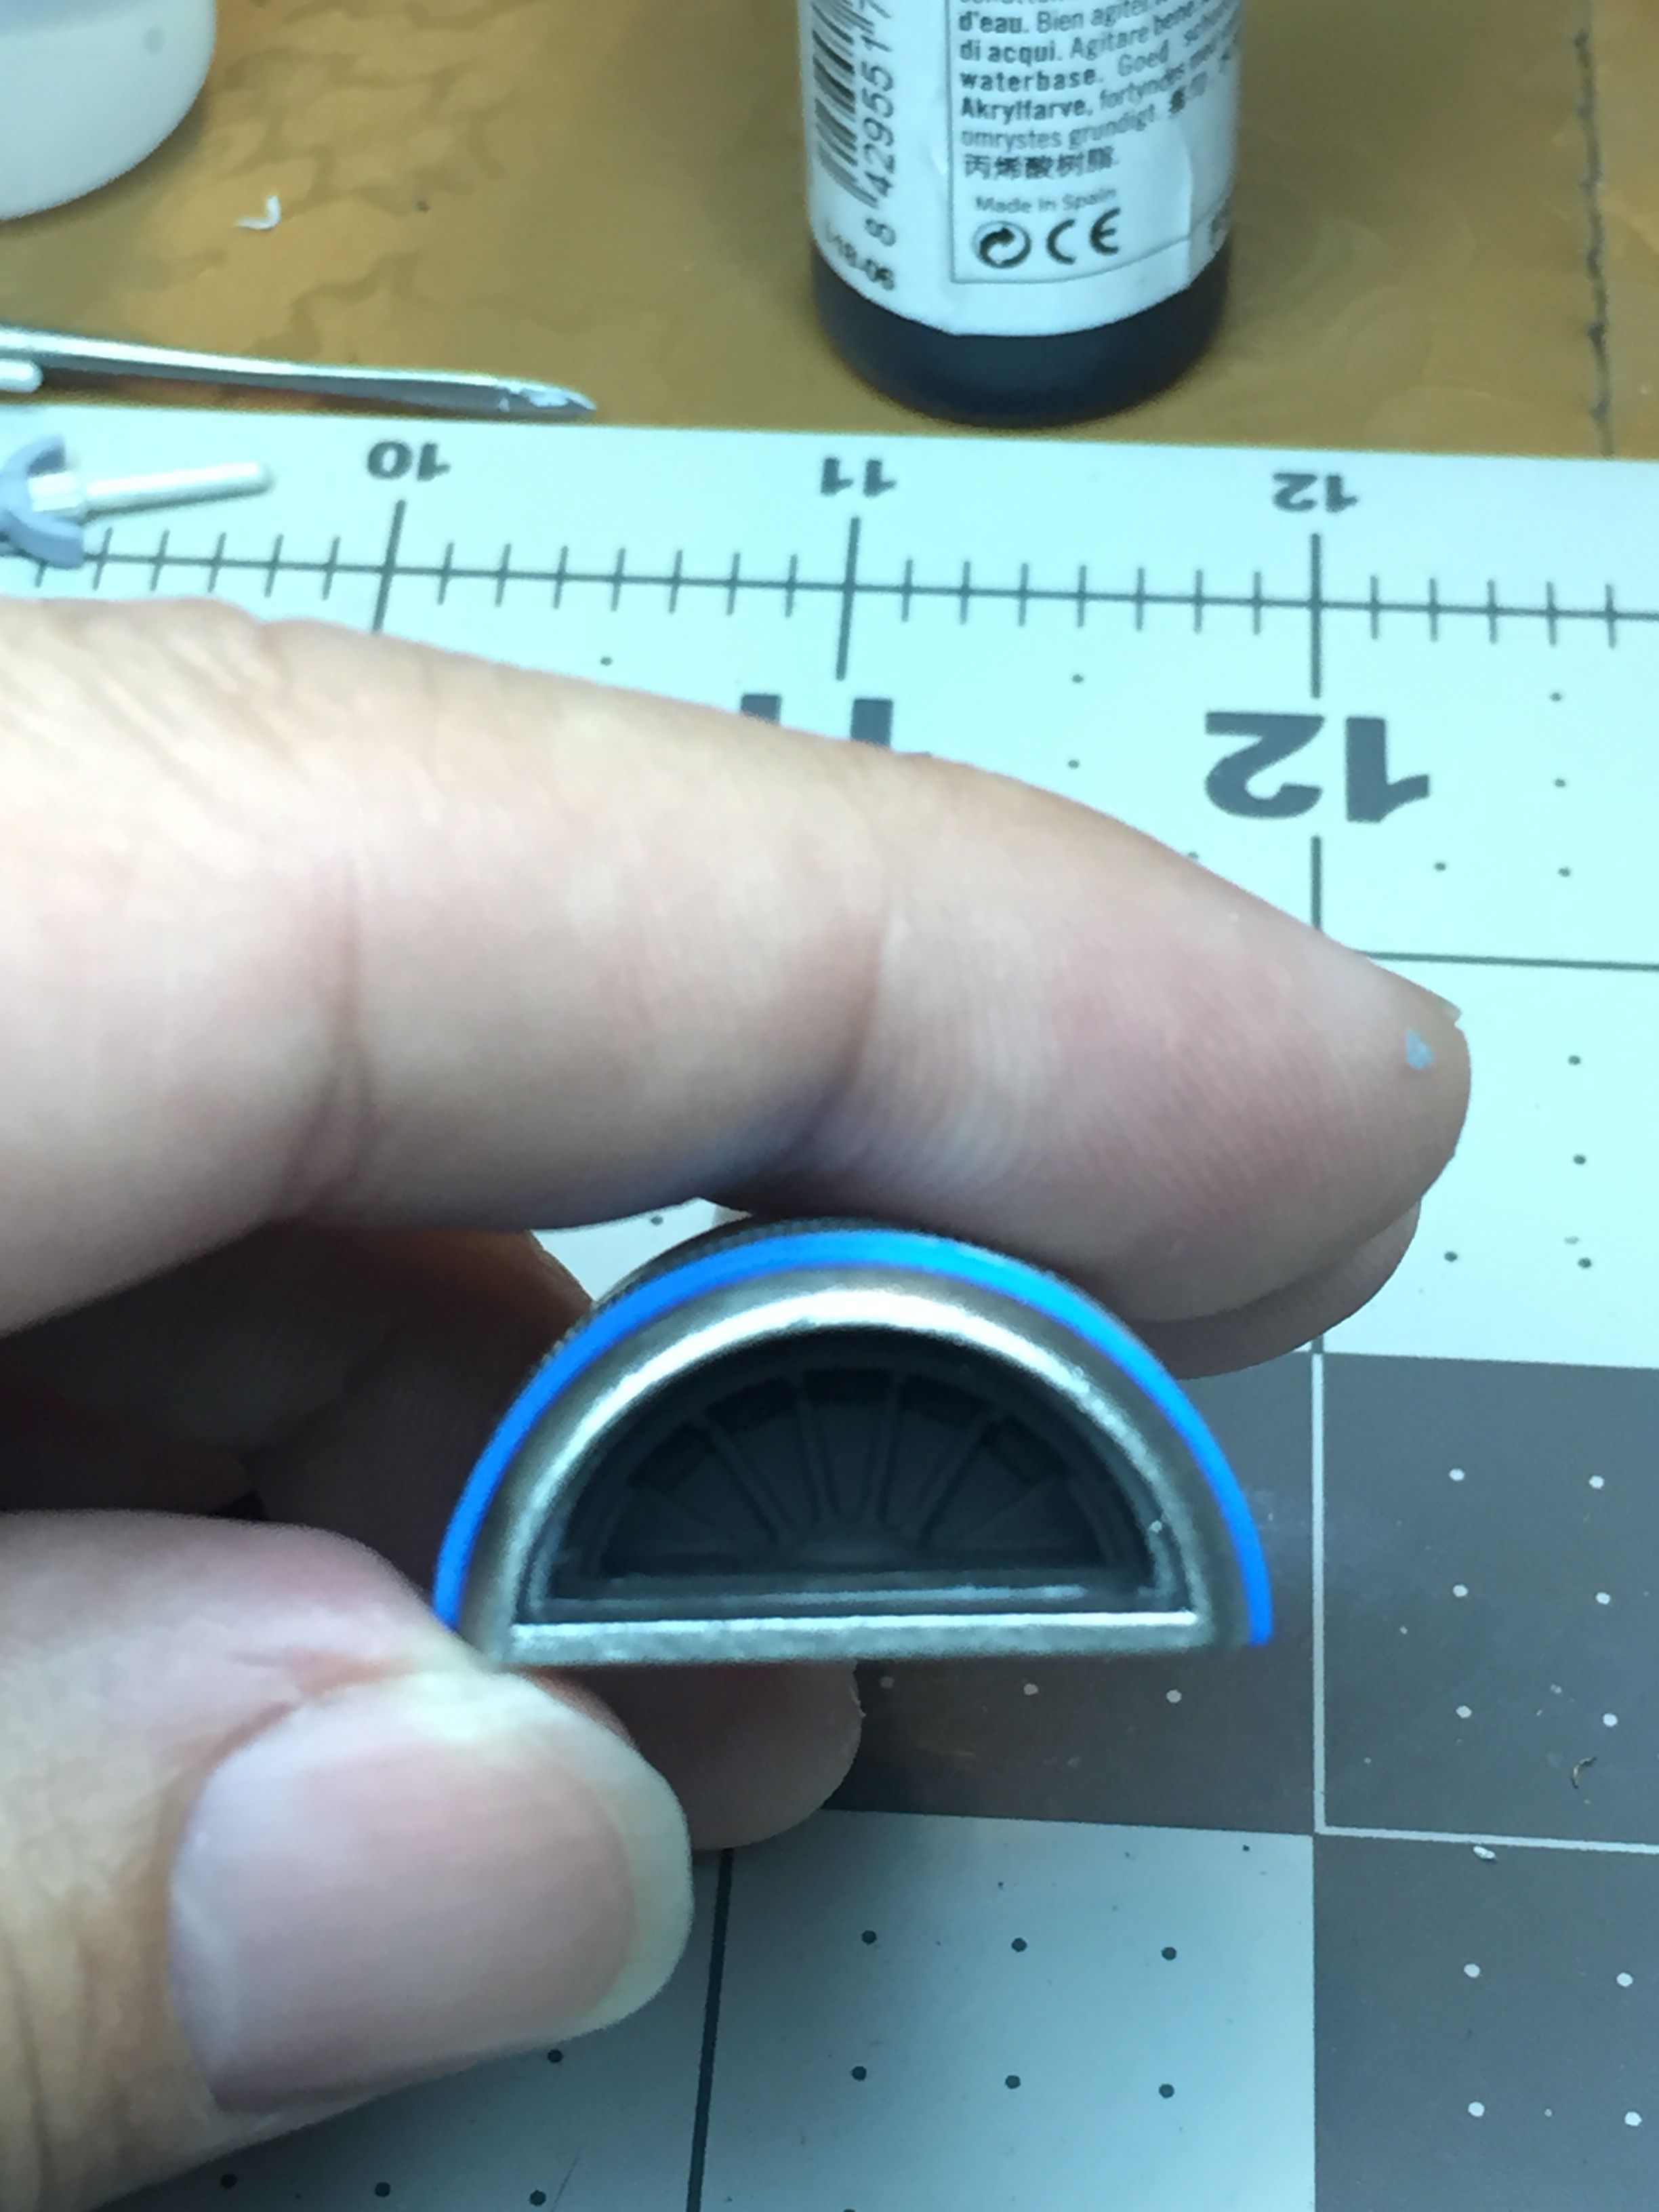
Again, I used the best match that I could for the blue. Plus, I thought that the inside of the intakes needed to be black, because you know, dirt and stuff. These things are supposed to be in-atmosphere as well as space craft.

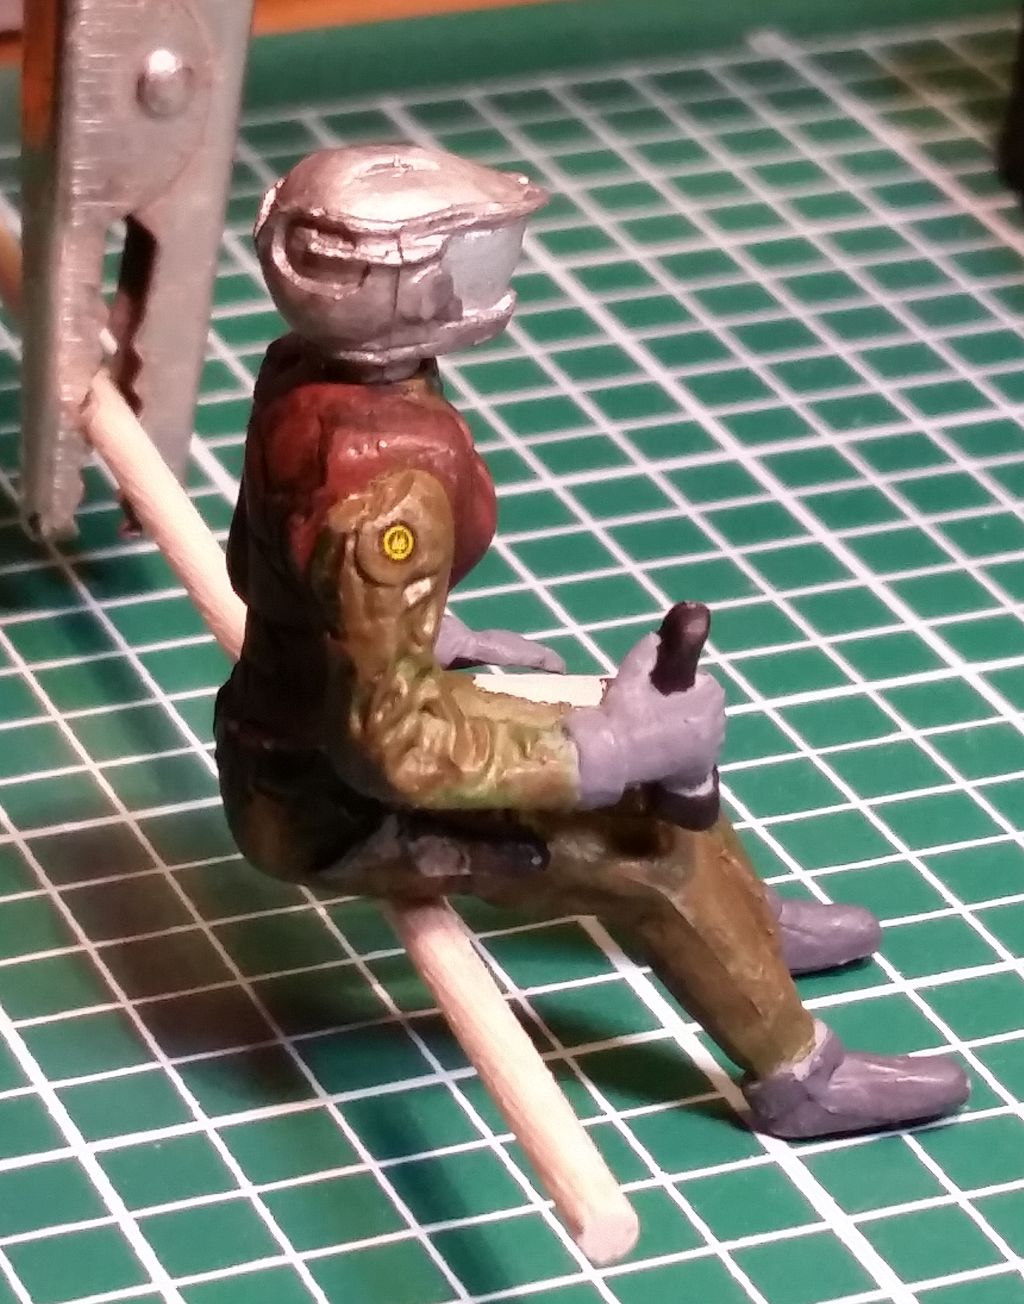
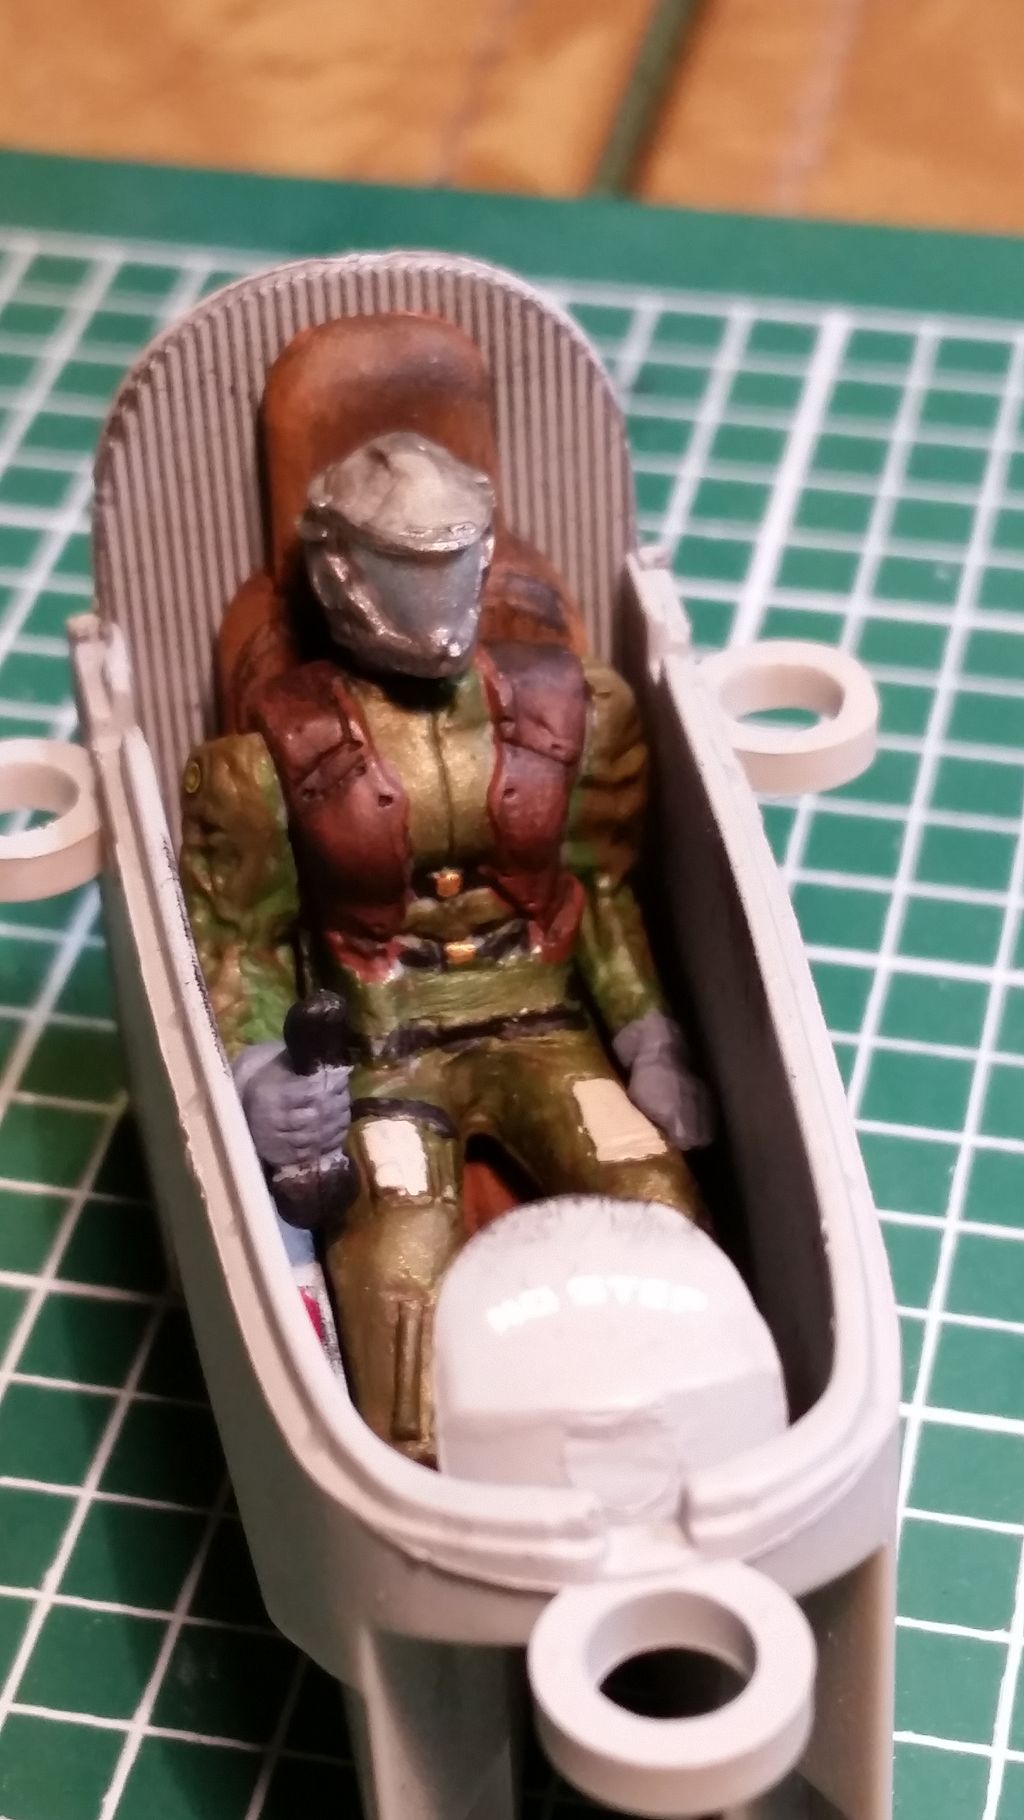
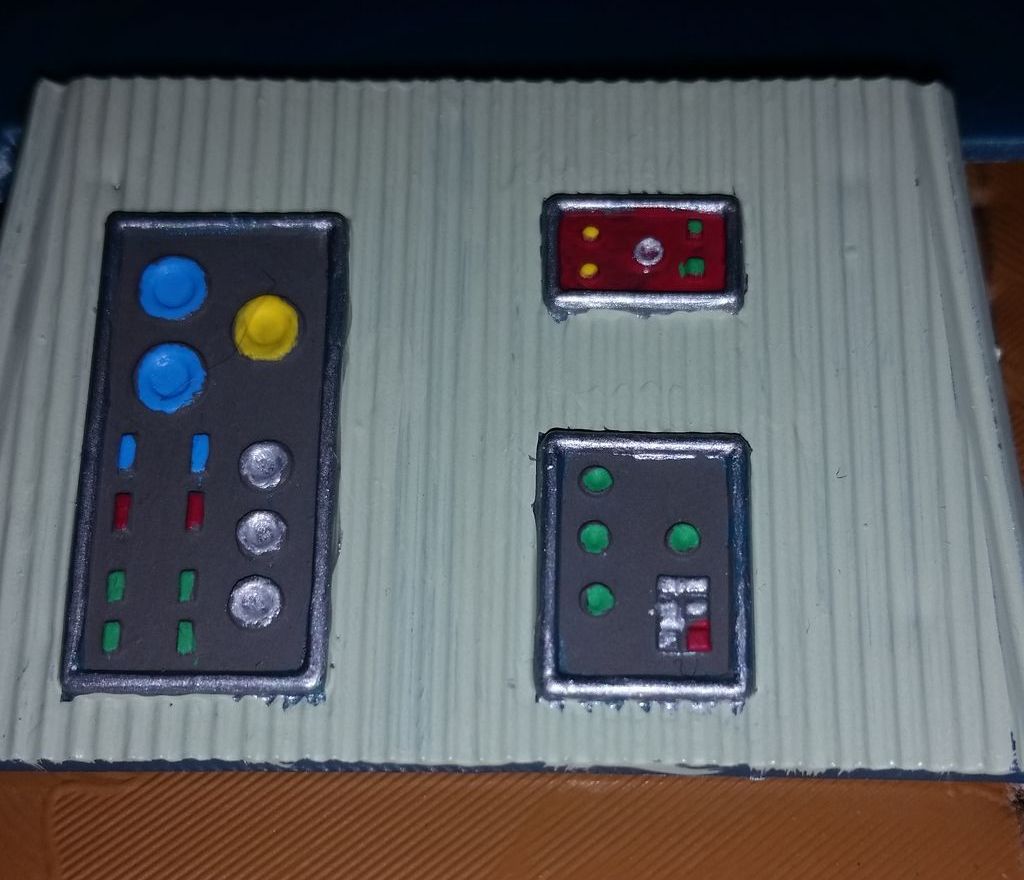
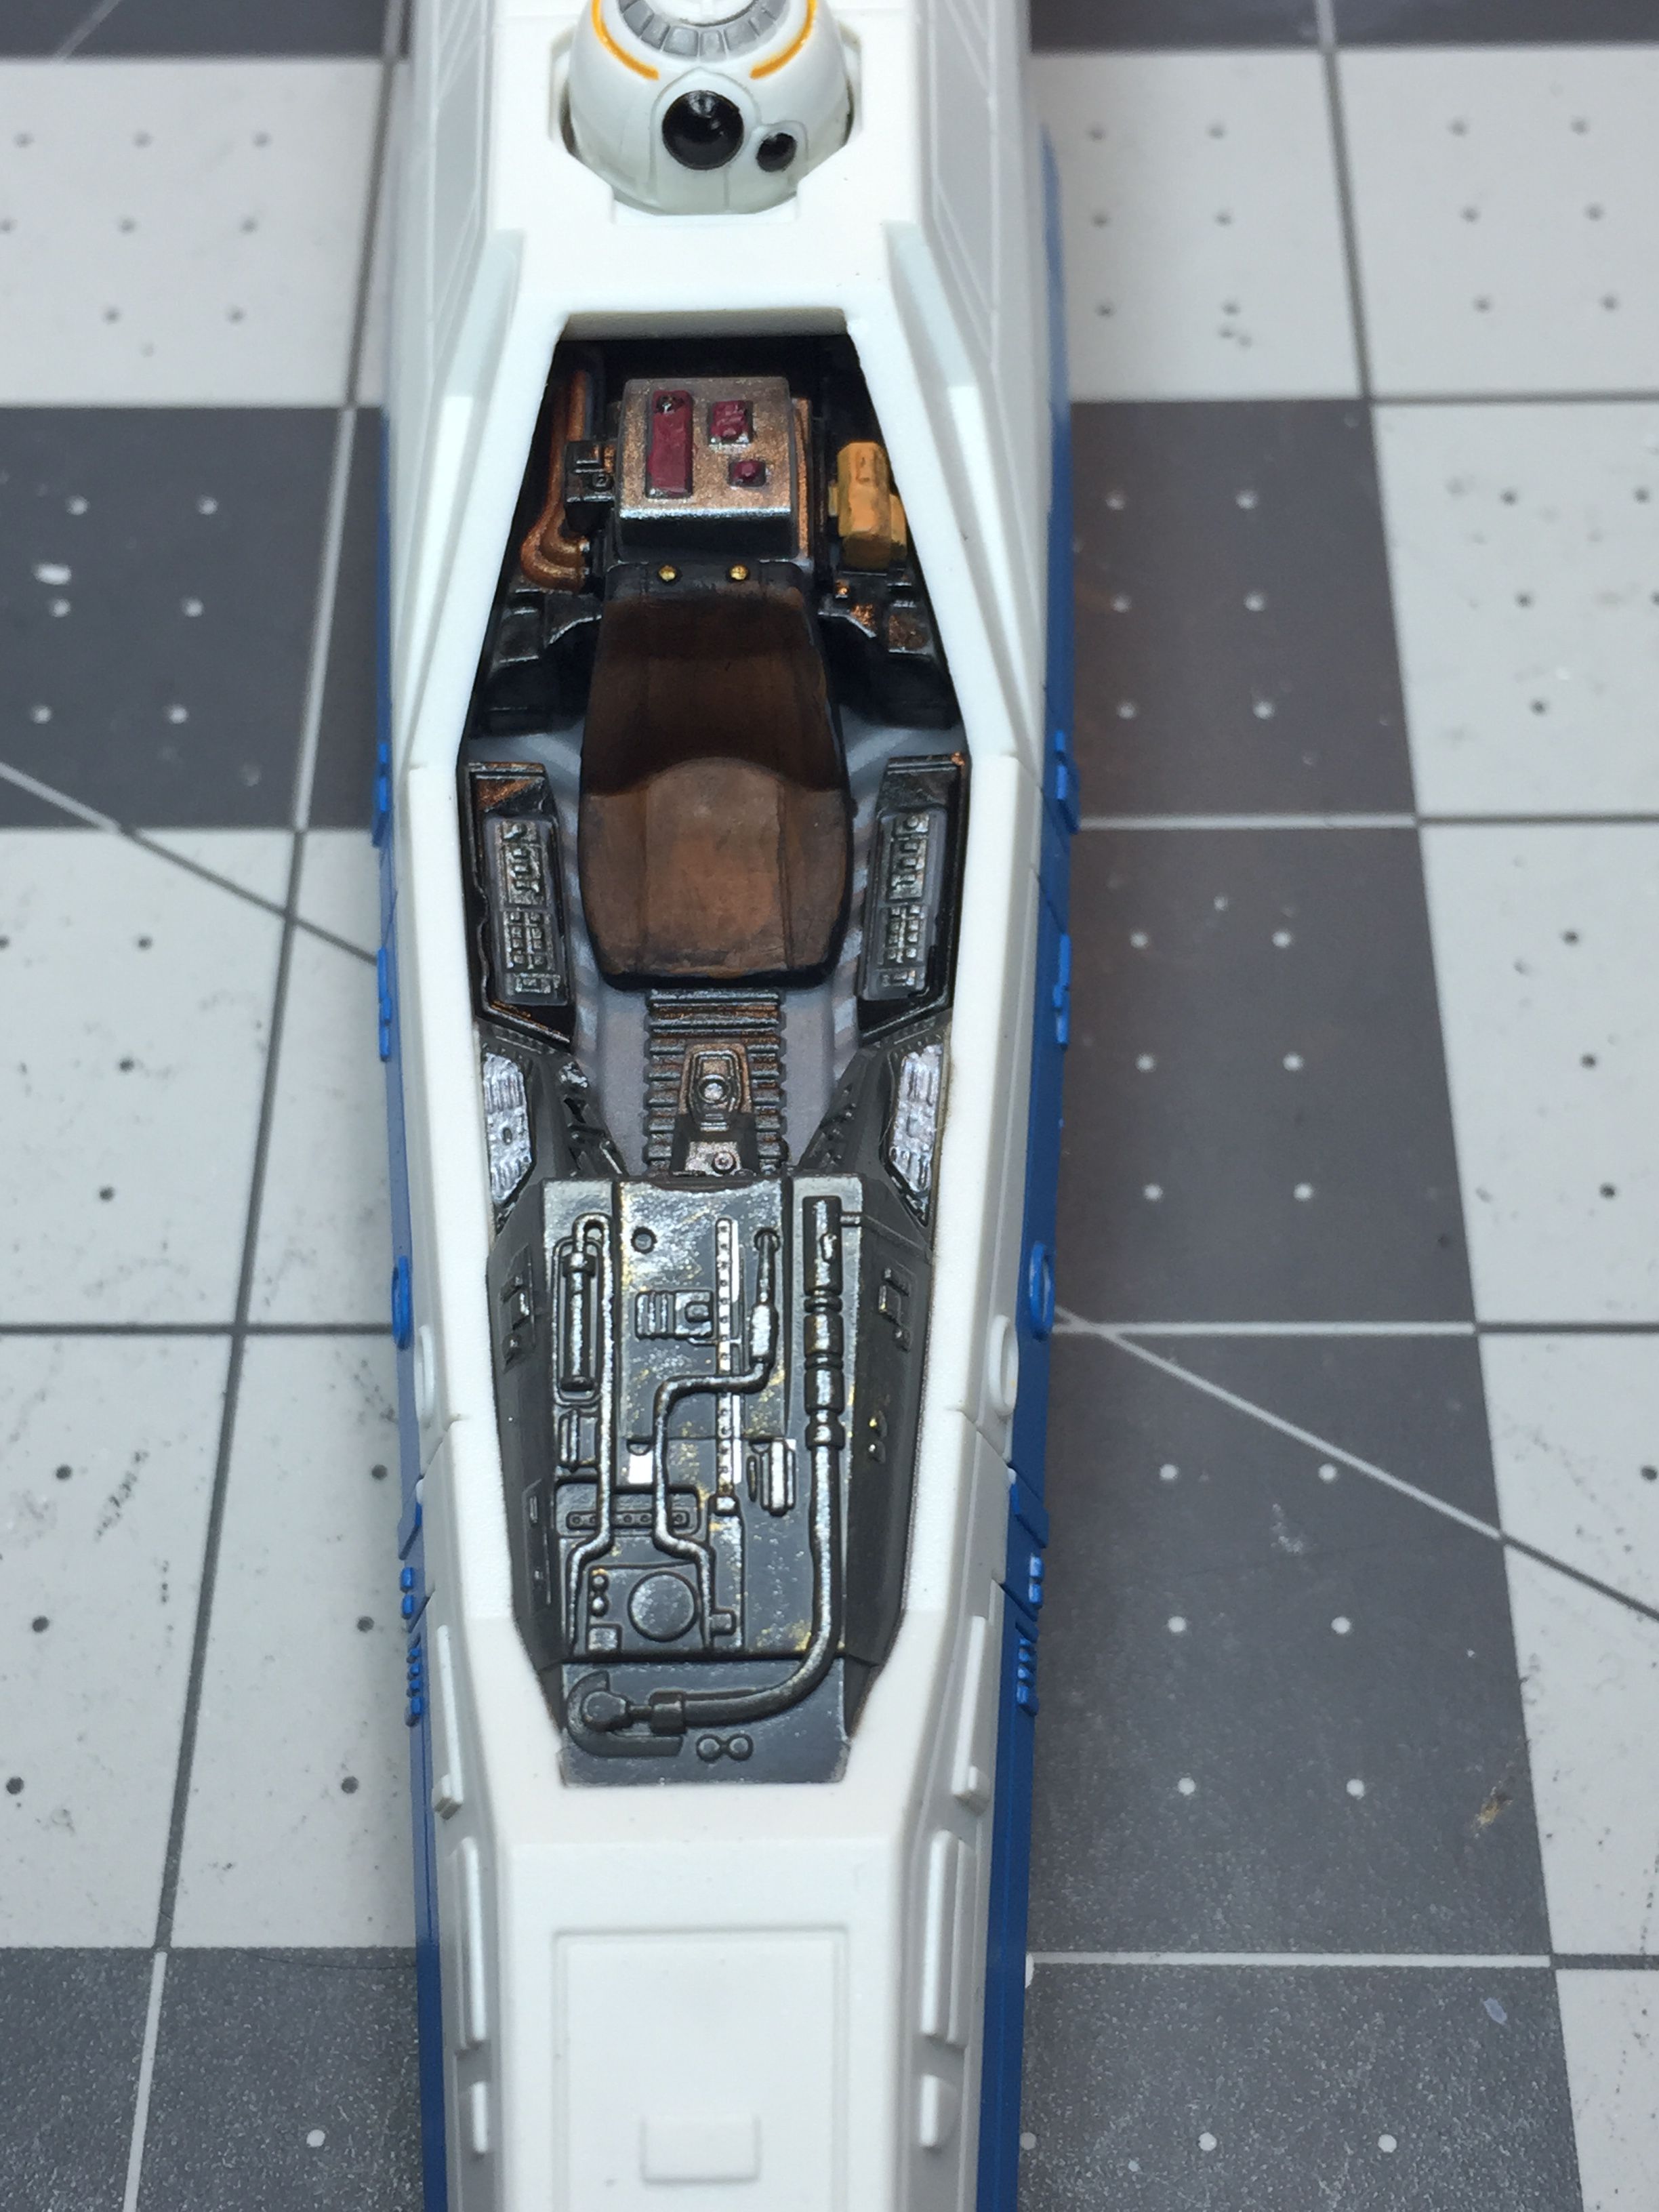
By far my most favorite part of painting this model was the cockpit. Having spent time in actual jet cockpits, and having no actual source material to go with, I just went with what I thought looked right.

CockpitFrontView

CockpitRearView

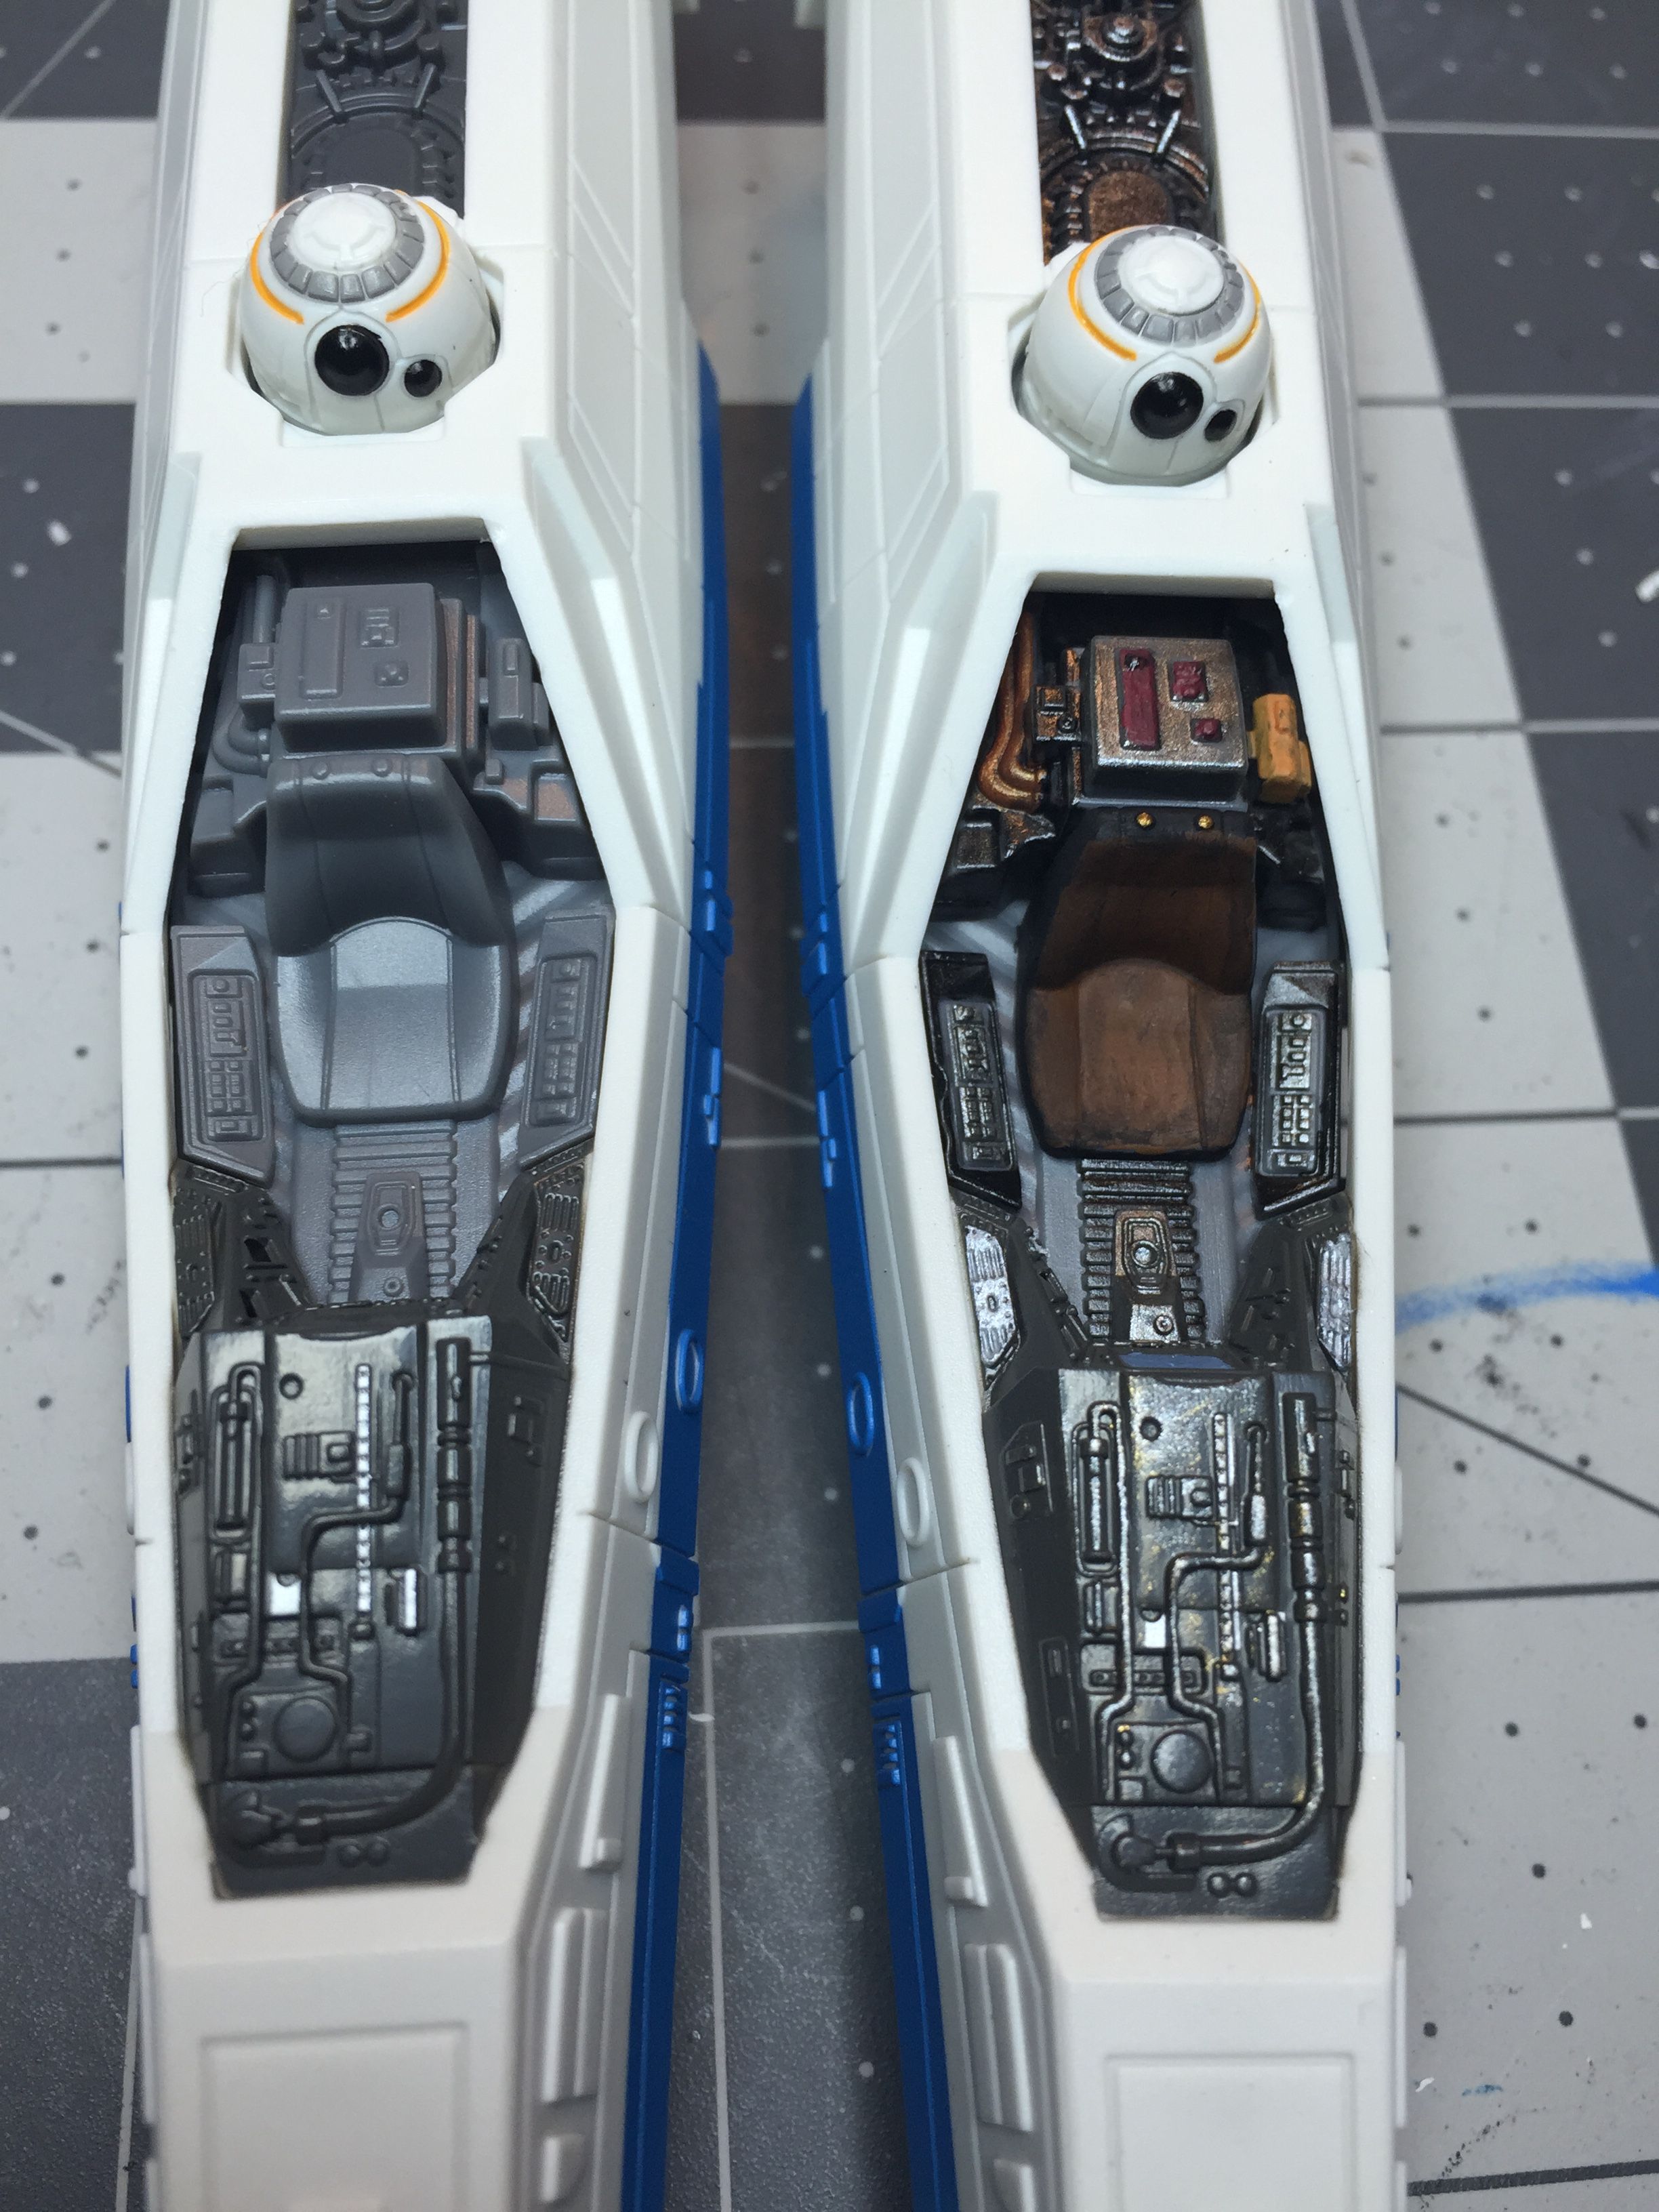
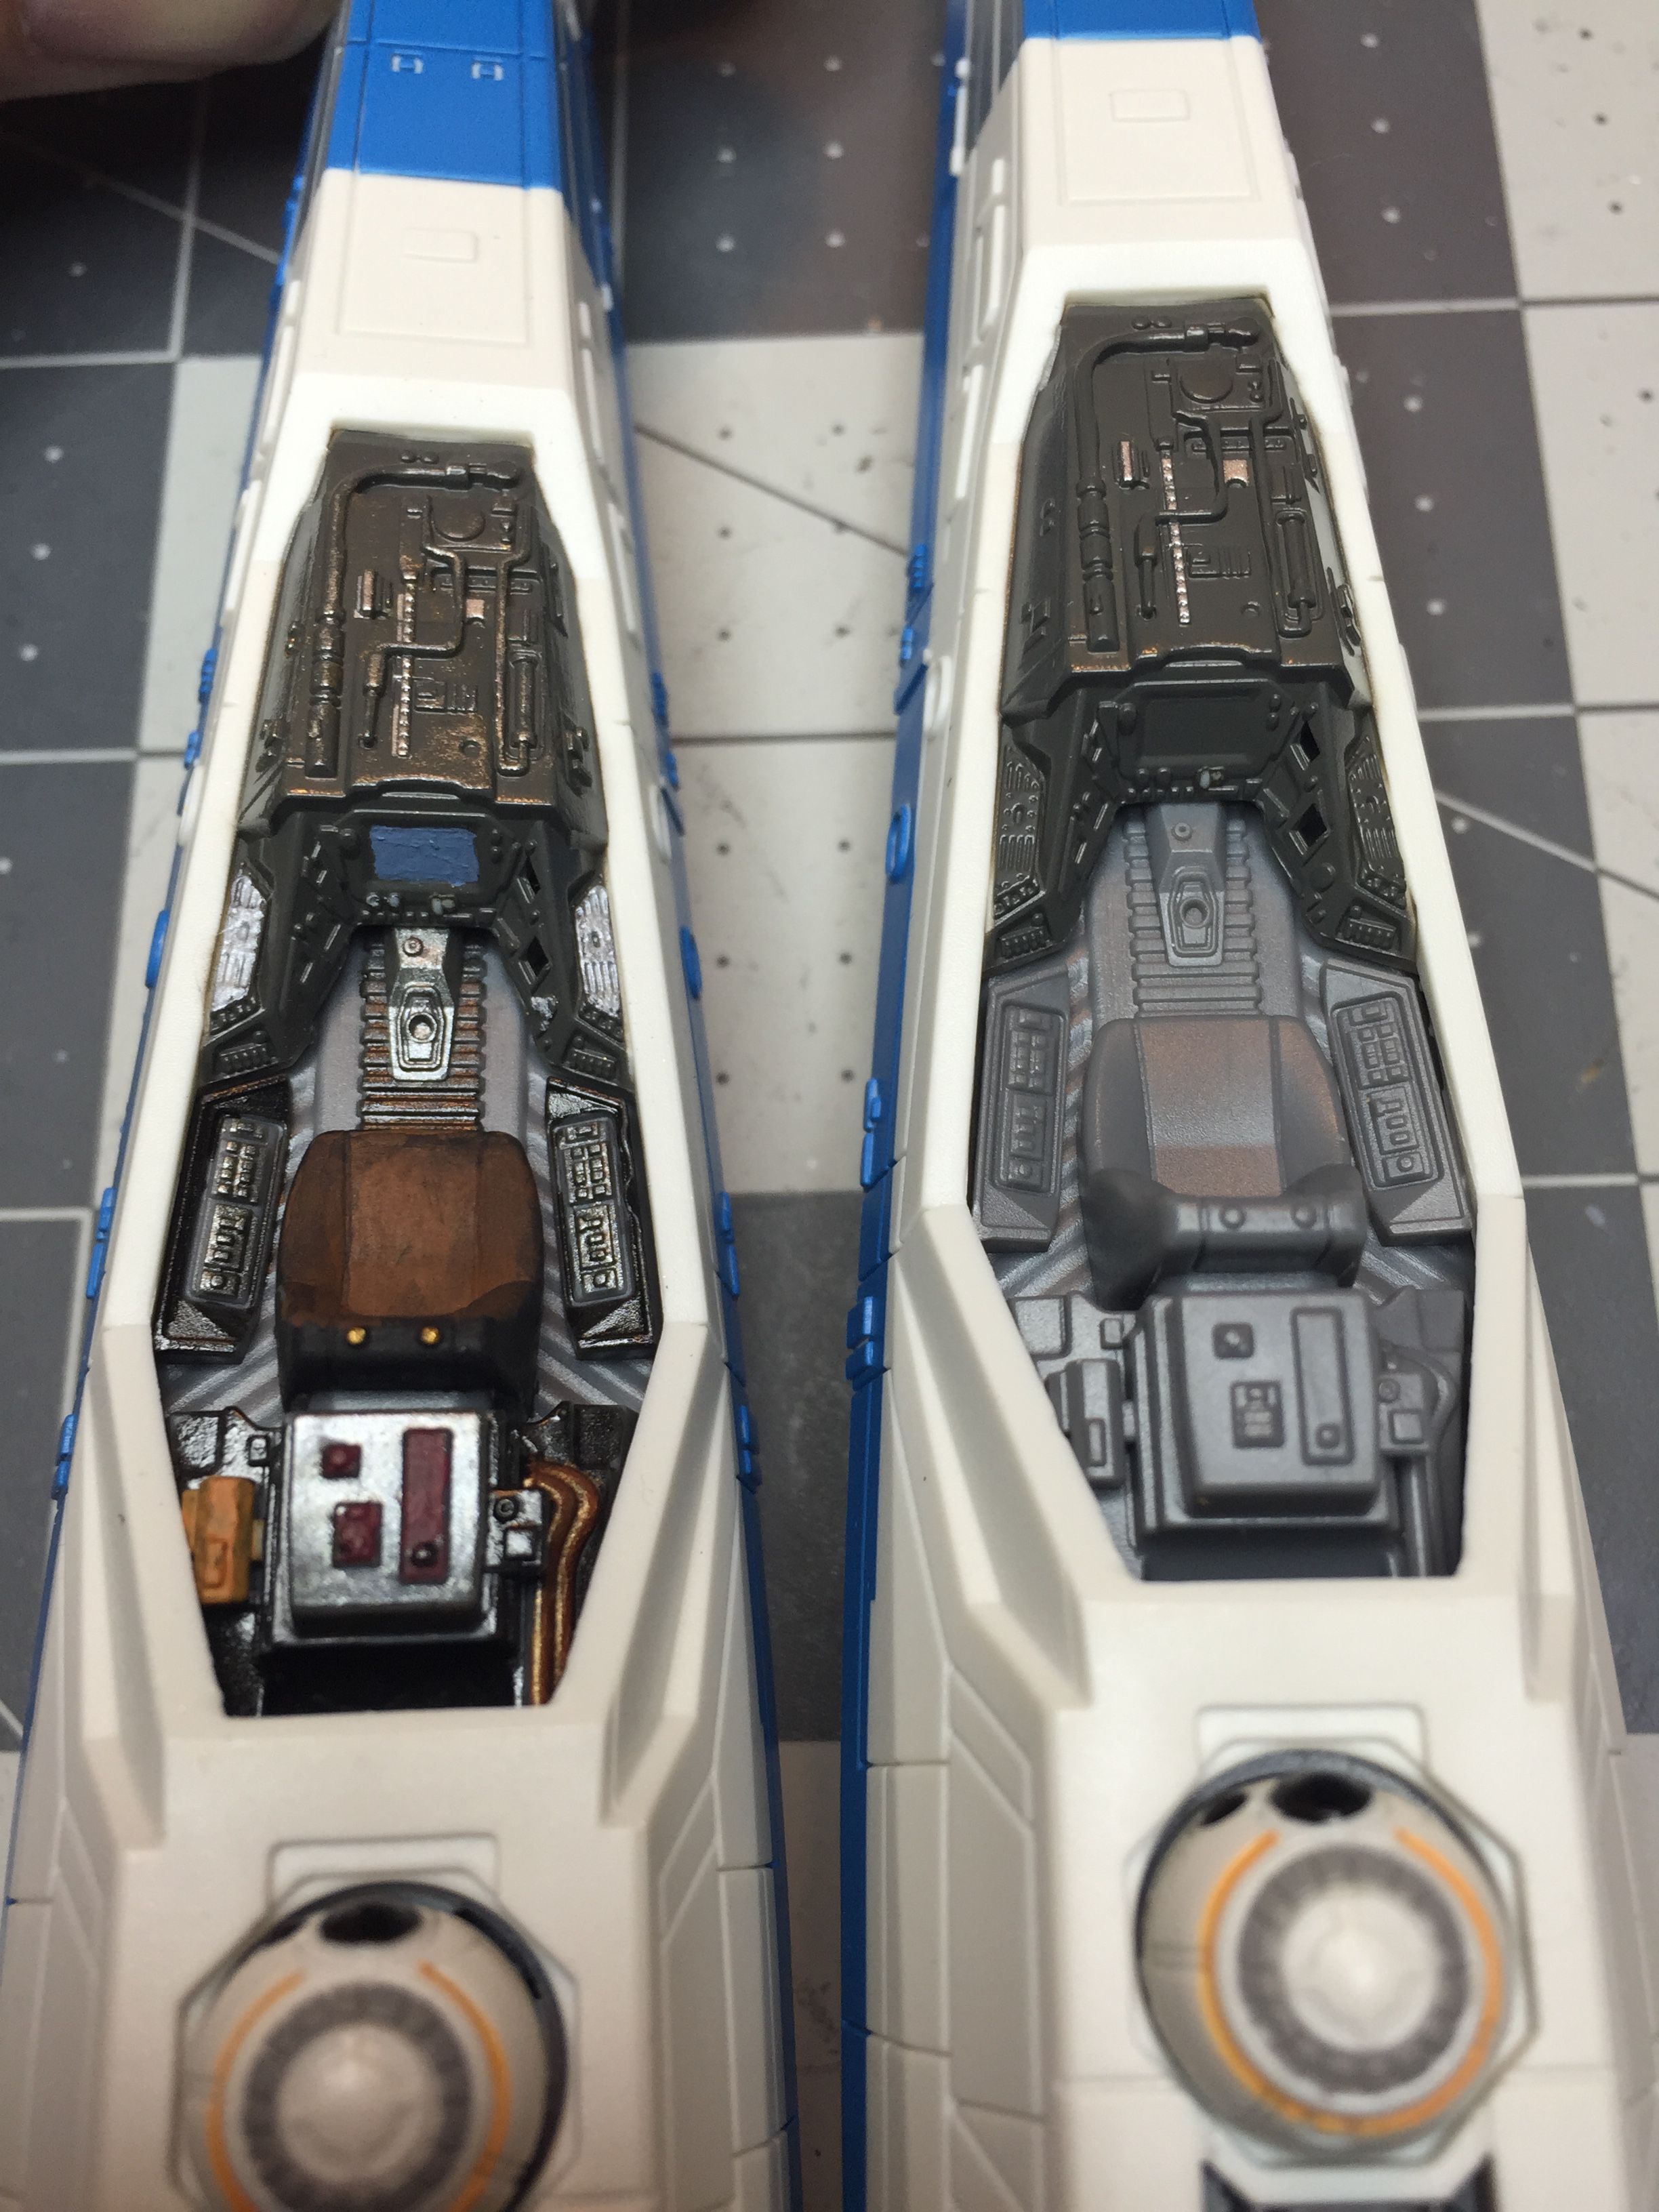
Just for kicks, I took a picture of the unmodded vrs modded views:

BeforeAndAfterFront

BeforeAndAfterRear


Once I had all the bits and pieces painted, it was time to put it together, which, as I said, took all of 2 minutes (I didn’t have any cupcakes in the house). Then came the overall weathering.

This was a bit of a challenge for me because weathering something that’s white, and not OVER weathering it, wasn’t something I’d done before. For this I used a medium gray wash, diluting it something like 5 to 1. I quickly discovered that, for me, the best way to do it and end up with some decent panel lines, was to wash the whole thing, then mostly wipe it off. I rewashed a bunch of the panel lines to make them come up, using I think, a 4 to 1 wash JUST on those panel lines that I thought were too faint.  I did the weathering in stages, starting with the assembled wings.

FirstWeathering

FirstWeathering-1

Once those were finished, I did the lasers, put the rest of the model together, then did the wash.

Finally, I dry-brushed black on various parts of the model to add a little more realism. I’d already taped the canopy, so this is the model just before the dull-coat.

IntakePreCoating

ltSidePreCoating

RtSidePreCoating

TopPreCoating


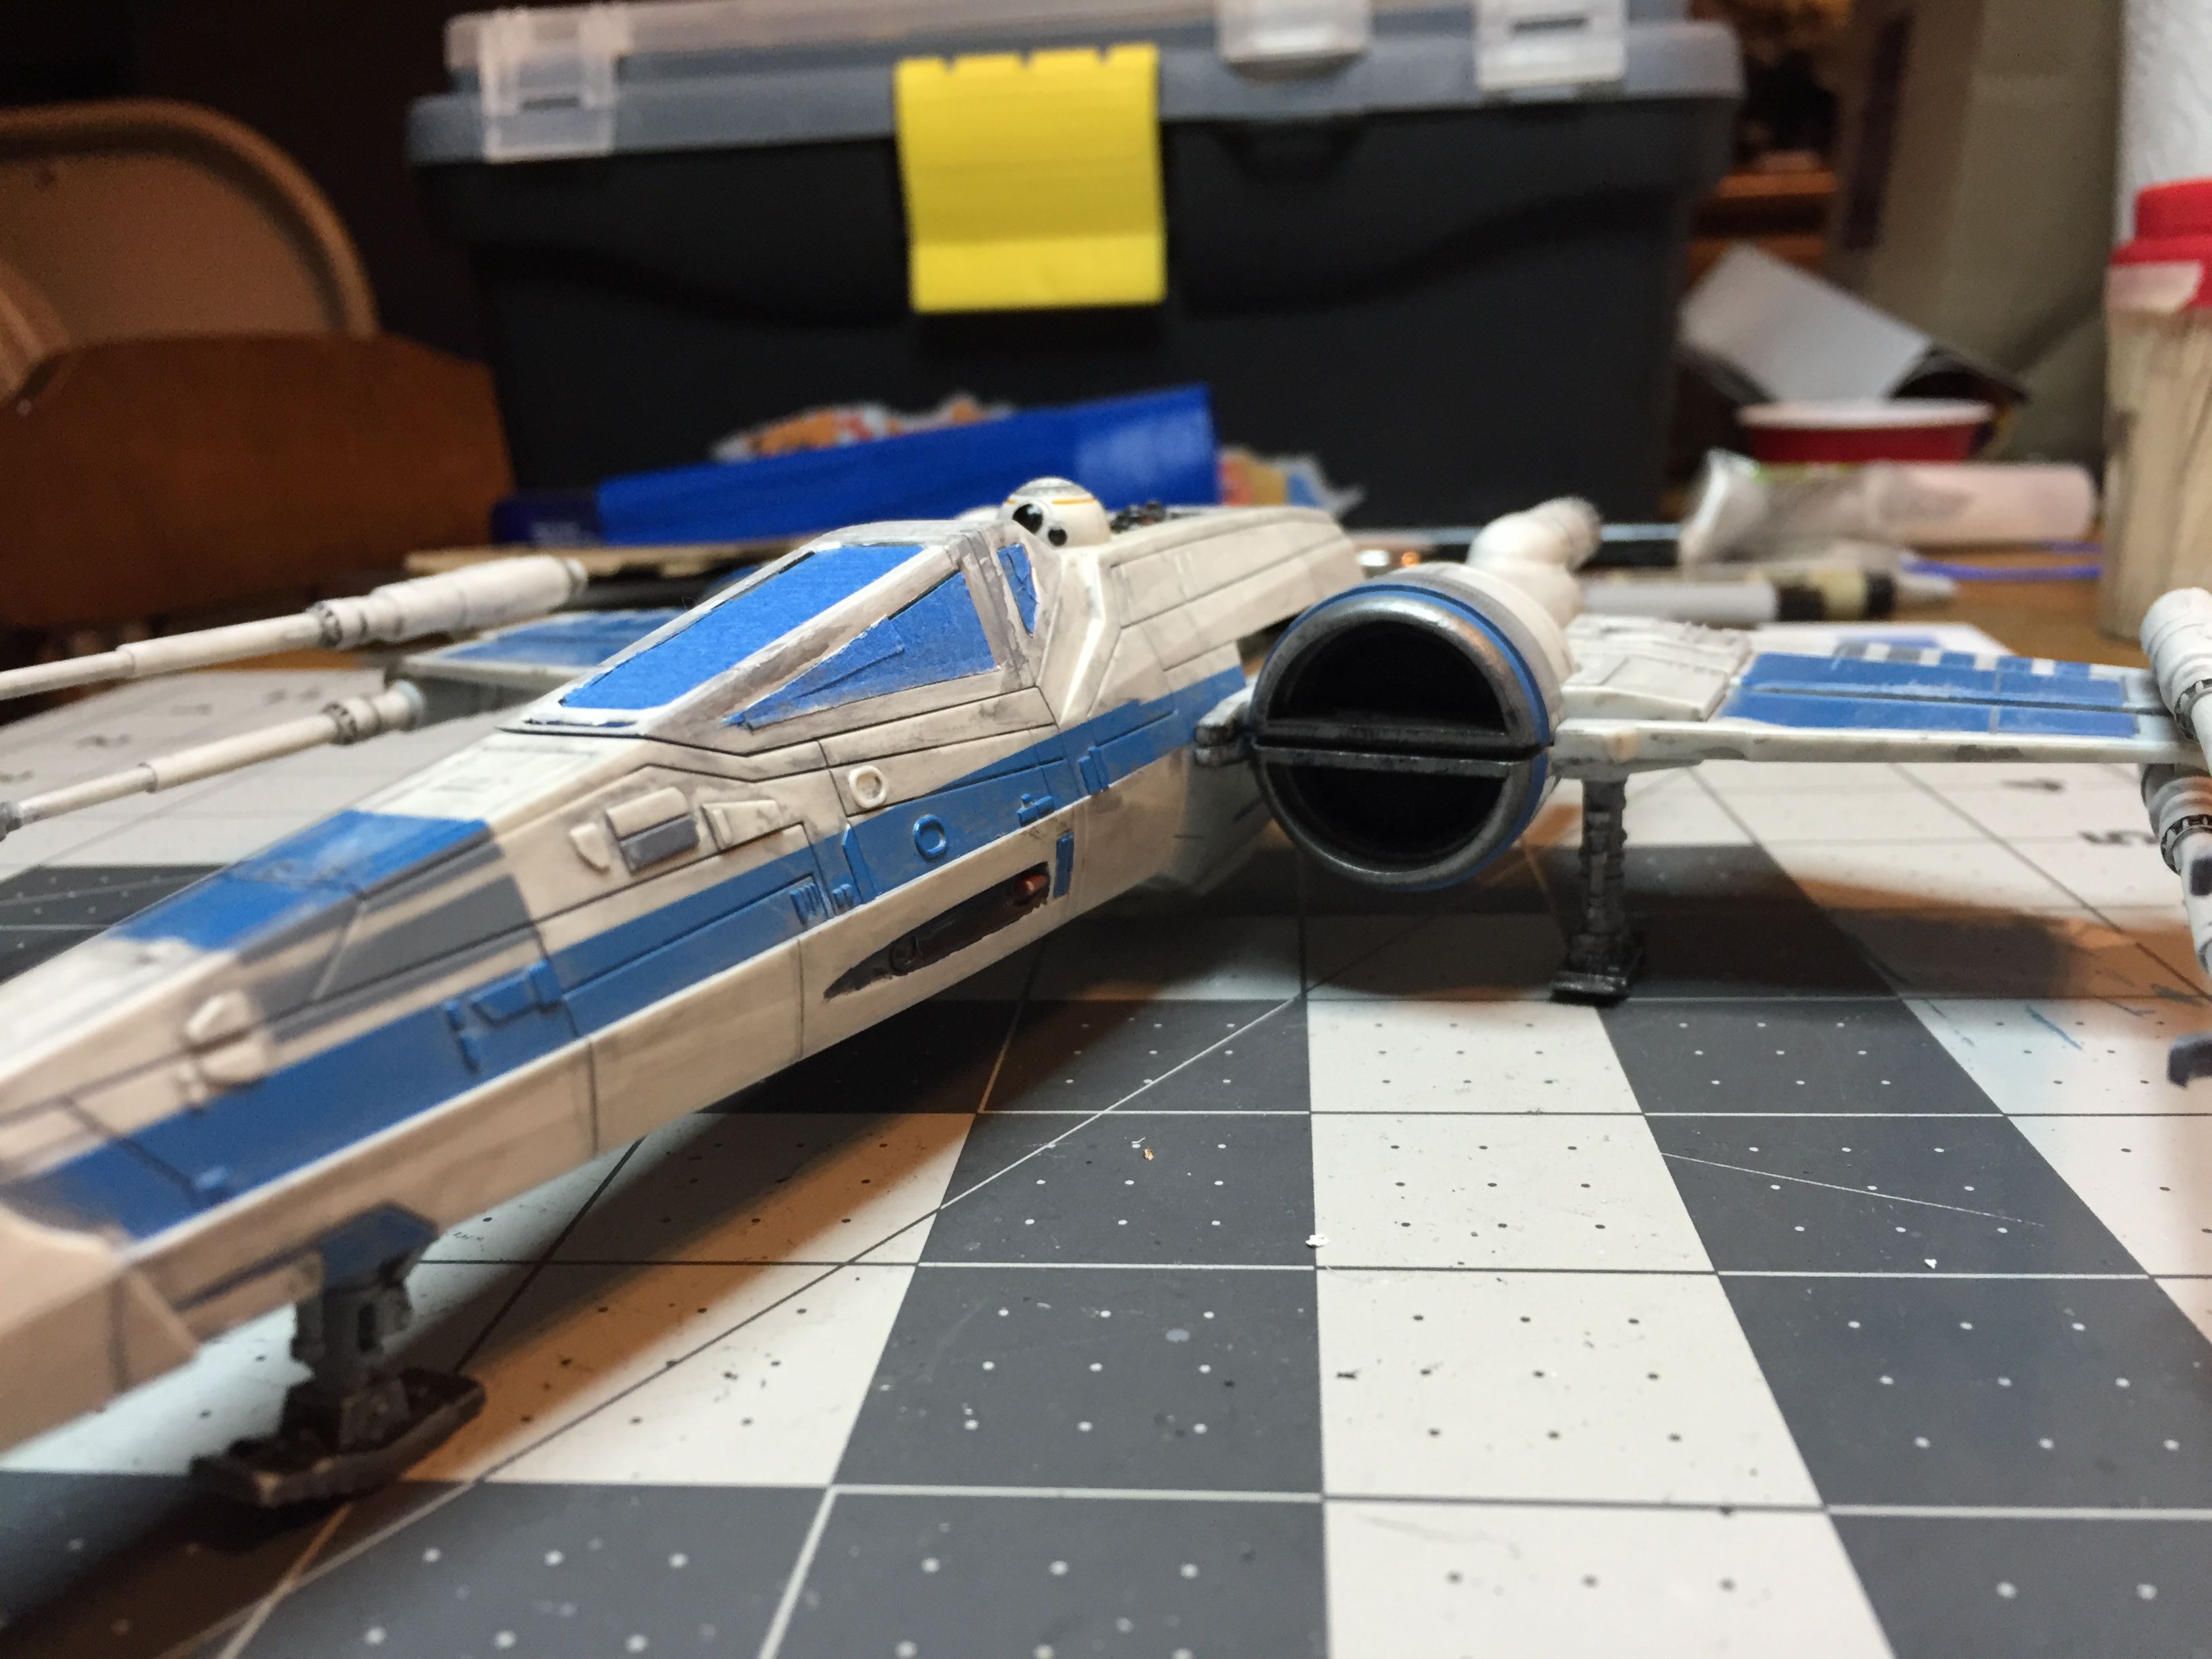
Just for kicks, I did some before and after pics so you can see that while the model is quite simple, you really can do some great stuff if you decide to paint it up.

TFA-XWingCockPit-Compare

TFA-XWingRear-Comparison

TFA-XWingRtSide-Compare

TFA-XWingSideRt-Compare

And here is one shot of the final model. I don’t think it turned out half bad for a level one model. Feel from to jump on over to the Gallery for more shots of the final model.

TFA-XwingLtSideFull

Building the Moebius BSG Viper MK VII

This kit was the second kit I decided to build. I wanted to do what I considered a ‘real’ model build — good paint job, getting rid of the seams and weathering so actually ended up buying two of the things in case I really screwed something up.

Initially, I spent a fair amount of time dry-fitting the upper and lower pieces together. I’d read that they weren’t molded to fit together very well, and that was correct. It took quite a bit of fitting and filing to get it to seat correctly. Other pieces weren’t as bad, but may parts still required a bit of filing and sanding. Dry fitting is essential.

So this was going to be A Real Model. Meaning I was going to spend some effort making the paint job somewhat “realistic”. I’d realized when building the Flying Sub that the days of spending five bucks on a Testors paint set and a brush were gone. Sure, you could still do that, but the paint wasn’t all that good and besides, I wanted to use acrylics.

I wanted the panel lines on the model to pop so I did some research and bought some micro pens. I’d already practiced some of the basics on some miniatures that came with the paint kit I bought.  Basics like washes and weathering.  I figured that I could paint the shell with primer, then paint it with the base color, then do a wash with black.  I’d even gotten an air brush to do the large areas know that I’m incapable of painting large areas of plastic (or anything else) without leaving brush strokes.

So I did just that. The primer went on with no problem and even the base coat looked good.  I’d decided against going with the colors recommended in the instructions because I didn’t think I could pull off making the blue look right. Grey it was.

Finished it up, let it dry then figured I’d do a black wash over it to fill in the panel lines.

DISASTER!

It looked like utter and complete crap.

After the paint had somewhat dried, and I knew it was going to look like crap I thought, what the heck? Let’s see if I can remove it before I go back and have to repaint the thing.  I wet a paper towel and started to scrub and WALAH! It worked!  Not only did the black paint come off, but it left the skin looking sort of like how I wanted it to look:

RearSectionThis was the tail section, and it seemed to look pretty good. The panel lines, however, were too faint until I went over them with the .03 micron ink pen that I’d bought just in case.  Here is what the top shell looked like after doing the black wash, then wiping it off:

Basic-Weathering

One of the things I really didn’t want to overdo was the weathering (although in the end, I’m not sure how successful I was). And, in fact, there are ALWAYS comments from people about the fact that you don’t need to weather a frakkin’ space craft! My response is, and was, that these fighters operate in space and in atmo, so it’s perfectly acceptable.

And since I was experimenting with various techniques, I decided to add one more.  Rust:

Rusted-LandingStrutThis was actually kinda fun.  I went and bought some rust effect paint from Citadel and tried it out.  I though it came out pretty good.

Doing the cockpit was not as much fun as I’d hoped. Sure, there are TONS of after-market decals and lights you can use, and, if you’re really good at painting (I’m not), you could go to town.  The stock cockpit is pretty plain though, and the only things I though came out well were the pilot’s seat and the dirt marks I figured would be on the edges:

CockpitSideLt

Since I still have another of these models, maybe I’ll do it up with lights and after-market decals. Some day.

The pilot was one of the more challenging pieces to paint, mainly because of the colors.  I did a bit of research on the BSG uniforms and helmets to help out because I thought the instructions were… lacking.  Mixing colors is not my forte, but eventually I got some colors that I thought would work. This is also where knowing more about how to work with putty would have been helpful.

Pilot-With-Decals

Of course, in one respect, all of the detailing work I did was for naught since you can’t actually see most of it once the pilot is sitting in the cockpit:

Pilot-In-CockpitImagine how much of that you can see once the cockpit is mounted in the ship.


One final adventure of note occurred when I put together the engine cluster.  I actually followed the directions, which was a mistake.

EngineClusterSee those copper colored bars between the engines?  Yeah, you can’t put those on AFTER you glue together the two bottom pieces. They have to be glued on to one engine and THEN you can glue the engines together.  Otherwise there isn’t a way to fit them in there (even with out that top engine added on).

Two other things come to mind about this build.  One is that the landing gear didn’t fit right.  I mean, it fit inside the provided holes nice and tightly, and originally I planned to display the model without the stand.  But then I discovered this:

Gear-NotFlat

So I ended up putting the model on the stand after all.

The other thing that proved problematical was that the model is unbalanced.  Even if the skids had been level, once everything is together the tail end of the model is very heavy and the whole thing tips backwards as soon as you set it down.  My takeaway there was to put clay or putty inside the front end of the next one so it will sit right.

All in all, I didn’t think the model was too bad for a first attempt.  It was also a fun build and I learned a bunch while building it.  To see all of the pictures, jump on over to the Gallery!

Building the Aurora Flying Sub

When I was a kid, my uncle and I built an Aurora Flying Sub model.  Of course, that was a long time ago, and that model was long since lost.  However, eBay is a (sort of) wonderful thing, and I picked up one of these kits a few years ago.  Then, last year, I decided that I wanted to build it.

One of the things about this kit — it’s not put together very well and as an inexperienced modeler I made a LOT of mistakes.  The end result of the build wasn’t all that bad though,  and it’s not like I’m going to throw it away or anything.

One of the first challenges I had was the painting.  It was surprisingly hard to get the masking right for the fins:

TopPieceMasking is, of course, second nature to experienced model builders — of which I am not — and I discovered all kinds of interesting things.  Like the fact that you really need to press down on the tape to keep the paint from leaking under it.  And then there was the fact that if you let said paint dry, THEN peeled up the tape, you took the paint with it.  Of course, it wasn’t only the fins that needed to be masked.  It was pretty much EVERYthing.


The next challenge was the teeny, tiny little guys that had to be painted.  And other parts, like the control panels and such because the model didn’t come with any decals.

All in all, I don’t think the guys turned out too badly for a first attempt:

20141210_215440

I also decided to do a bit of detailing to the panels and the engines:

EnginesSide Panel 1All of that painting was done free-hand and I promise that it looks better in person.  The camera is pretty unforgiving.

I mentioned earlier that the parts simply don’t fit together very well, and the internal support structure as seen here, was pretty challenging:

InteriorFrame-Rt

And the end of the day, the build was fun.  Not something I’d recommend for a starter kit though.  eBay seems to be the only place to find the things, and they can be quite expensive.  Feel free to hop on over to the Gallery where you can see more of the pictures.